
Earthworks: preparation
Installation prerequisites: Level and prepare your ground
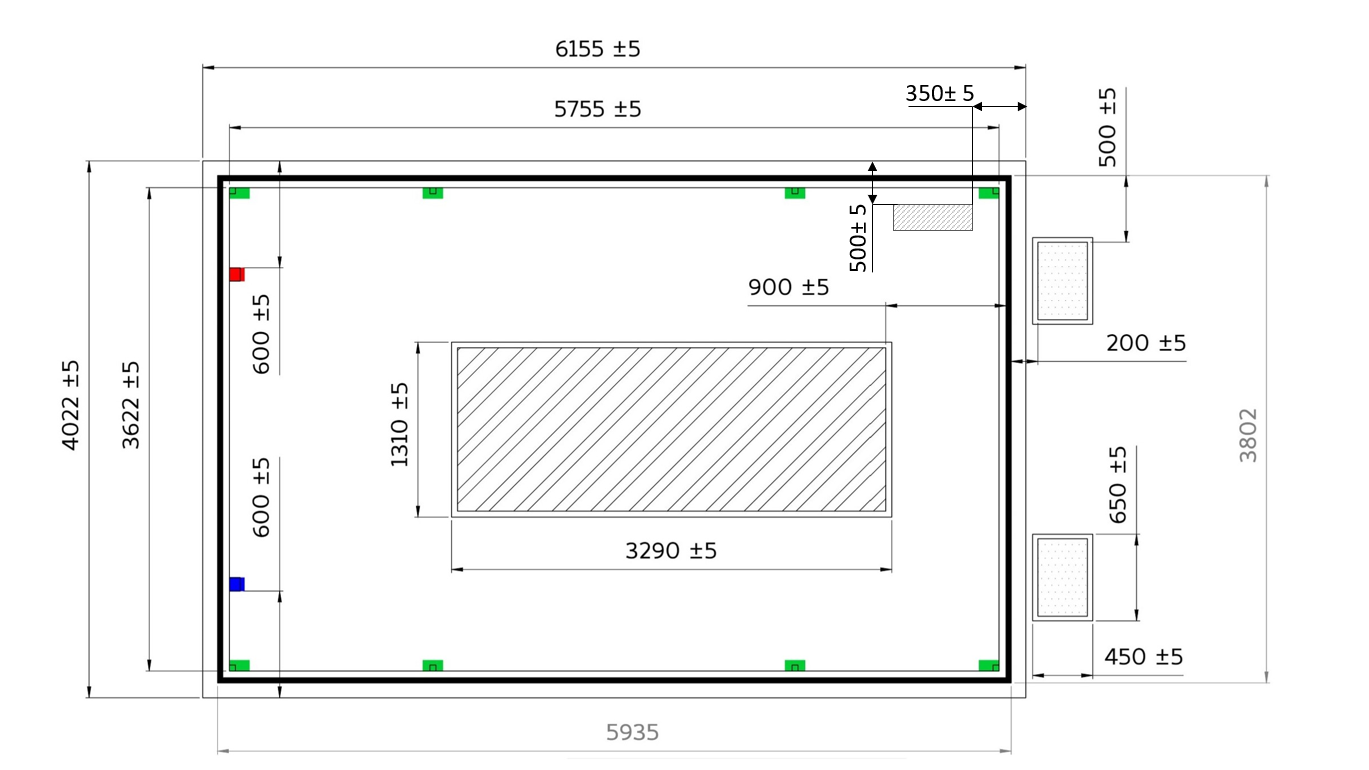
Dimensions family on 20 cm wide formwork blocks and a central island.
In red, electrical supply. In green, anchoring. In blue, recommended water supply with tap. Dimensions in mm. In the middle, the structure of the tanks. At the back, the water collectors. Recommended distance between the tanks and the back of the greenhouse: 90 cm.
| Greenhouse type | Preparation required |
|---|---|
| City with or without floor | Levelling AND earthworks ↦ mandatory Concrete perimeter OR full slab ↦ recommended |
| Family without floor | Levelling AND earthworks ↦ mandatory Concrete pads with anchoring ↦ possible Concrete perimeter OR full slab ↦ recommended |
| Family with floor | Levelling AND earthworks ↦ mandatory Full slab OR wooden structure and screw-pile foundation ↦ mandatory |
| Family with pellet stove | Levelling AND earthworks ↦ mandatory Full slab OR floor ↦ mandatory |
| Family44 (double greenhouse) | Levelling AND earthworks ↦ mandatory Full slab OR wooden structure and screw-pile foundation ↦ mandatory |
Technical documentation for earthworks professionals:
MYFOOD-DOCUMENTATION-TECHNIQUE-TERRASSEMENT.pdf
Technical documentation for earthworks and positioning the holes for the concrete-pad configuration: MYFOOD-TERRASSEMENT-PLOTS-BETONS
1. Mark out the area to be levelled
First, mark out the area to be levelled using stakes driven into the ground and a string stretched between them.
You can refer directly to the technical sheet corresponding to the chosen solution.
ImportantFor perfectly flat levelling, the depth or height of the stakes does not matter. It is the horizontal level of the string line set in the next step that counts.
2. Loosen the soil
Levelling is done by moving soil from the high point to the low point. Depending on the size of the area to be levelled, several tools may be needed:
- You can loosen the soil with a garden fork and a pickaxe.
- Using a tiller or rotavator can be useful to complete this step with minimal effort.
3. Remove any stones and roots
Once the soil has been loosened, it becomes easier to remove stones and roots that may interfere with levelling.
NoteThis work must be done to avoid stones and residues on the soil surface and should not take more time than necessary.
4. Level the ground
You have now reached the stage of levelling the ground. Several options are available:
- Use a rake and a shovel to move the soil from the highest level to the lowest level, then smooth it out.
- Use a ladder or a long wooden board to move the soil from the highest level to the lowest level. This operation is easier with two people.
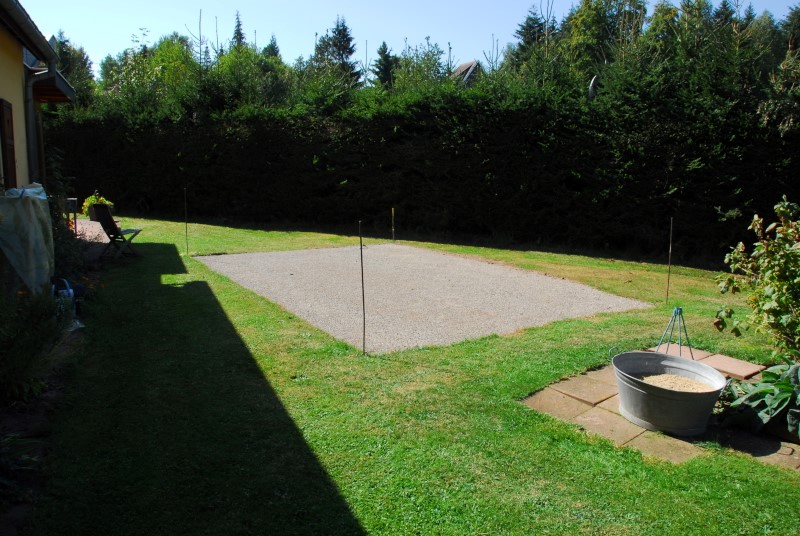
5. Compact the ground
Using a lawn roller, compact the ground so that it takes on a very flat shape. Rolling may reveal imperfections that you can then correct immediately, as long as the ground can still be worked.
For an installation with concrete pads and anchoring, it is important to provide stable concrete reinforcement at the level of the central structure.
Installation on concrete pads and anchoring: make sure to create the holes before your installer arrives, according to the plan.
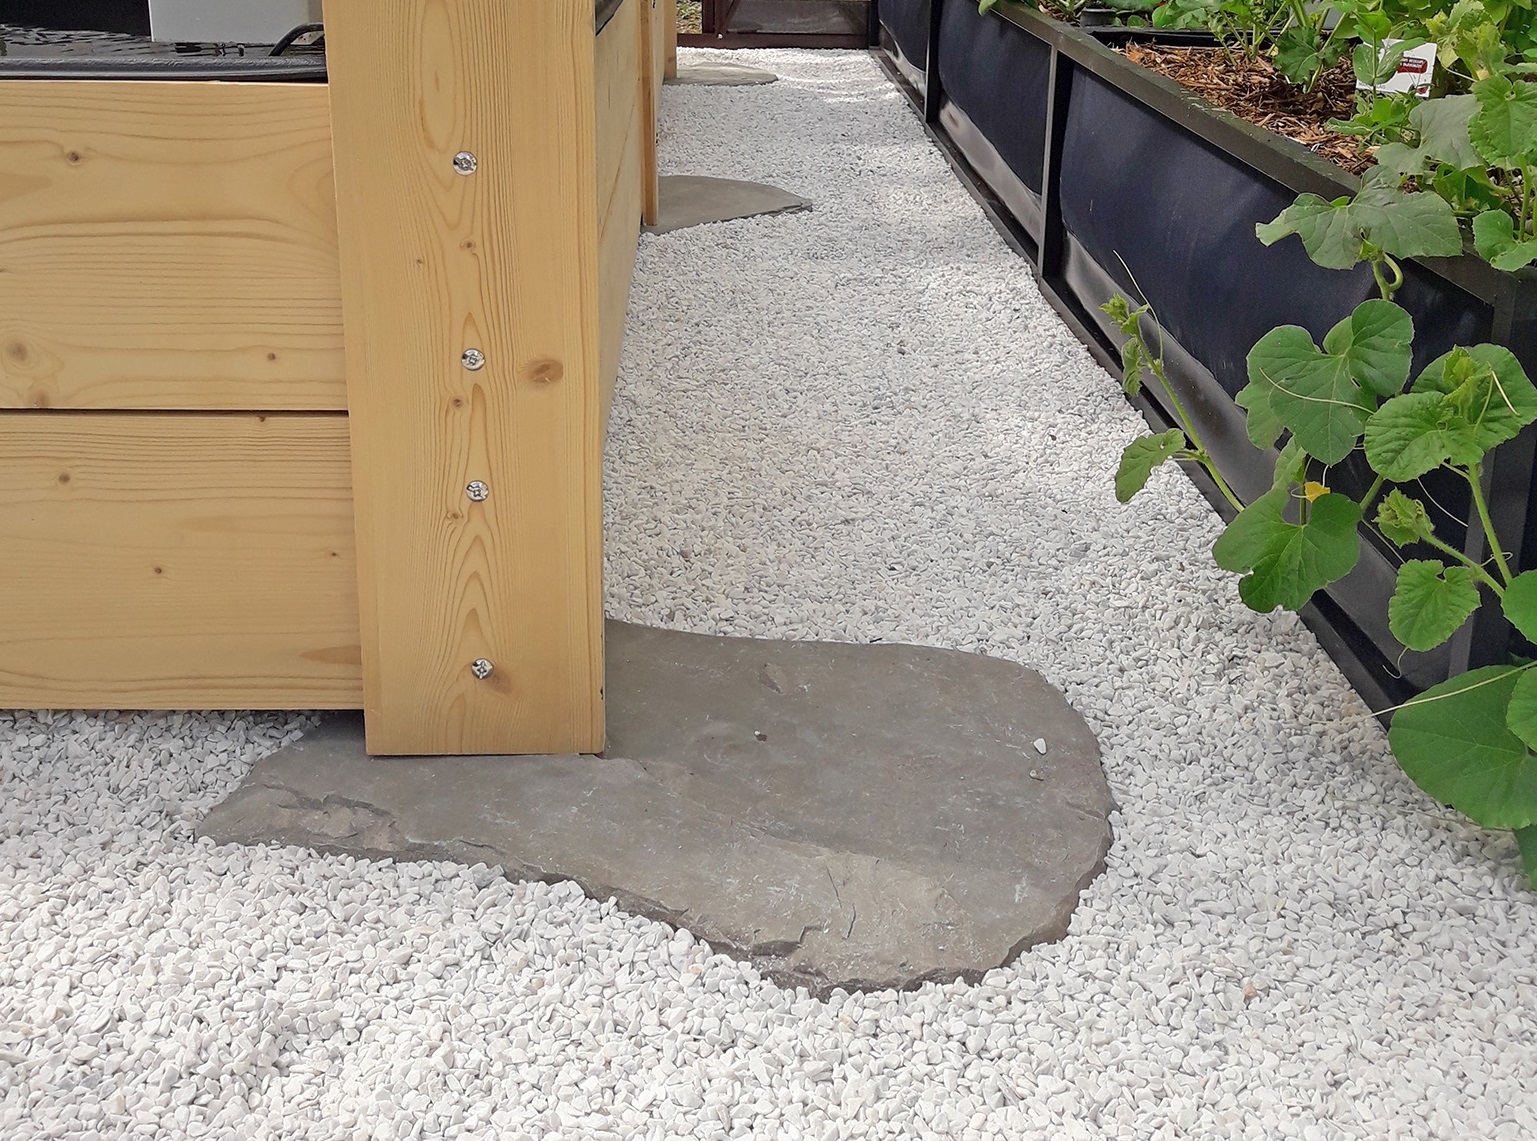
Installation with concrete pads, stone slabs and light-coloured gravel (Slabs and gravel not supplied)
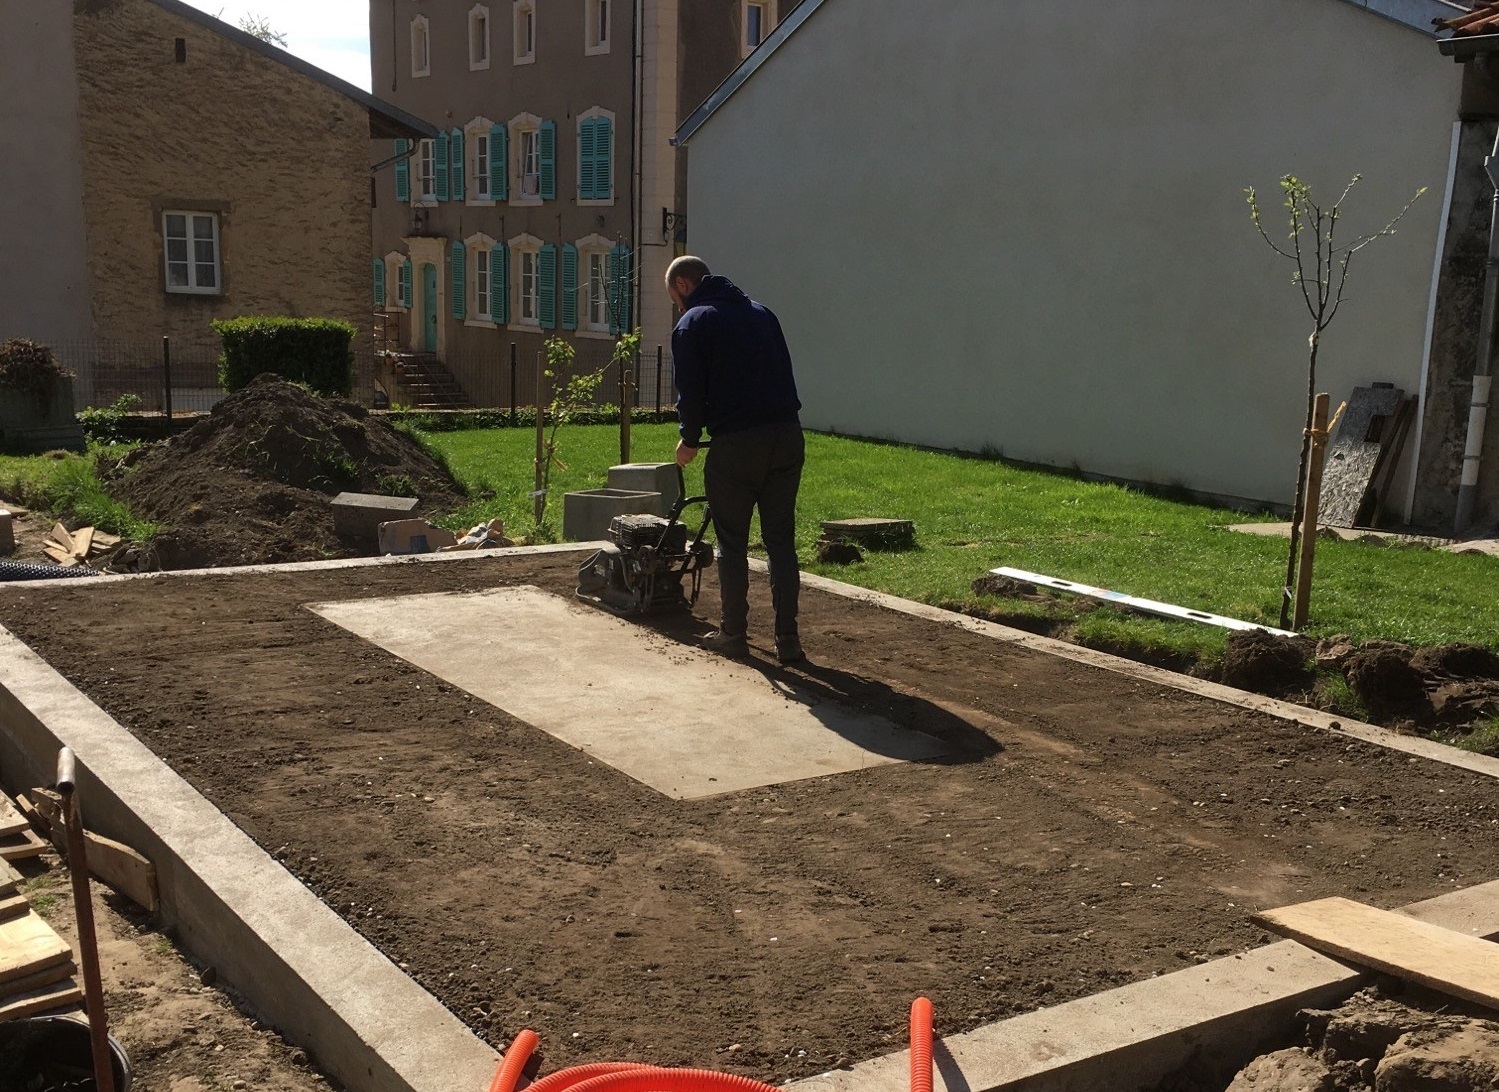
Use of a plate compactor for soil compaction. Installation with a concrete ring beam and central reinforcement.
6. Let the ground settle
Before using your levelled ground, let the soil settle for at least 48 hours:
- Spray with water at least three to four times to help the soil compact.
- Do not walk on the ground or install anything on it, otherwise you may sink in and break the level.
- After 48 hours, roll it again with a lawn roller.
TipYou can cover the ground with an oilcloth sheet or a tarp while waiting for installation. A geotextile fabric and gravel already in place will allow your installer not to work in mud and will isolate your greenhouse from the ground and from grass regrowth.
7. Soft ground: prepare a concrete perimeter
If your ground is prone to subsidence or if you want to ensure the installation lasts on the ground, it is recommended to create a smooth concrete perimeter. To do this, you will need either to make formwork and pour concrete at the location of the greenhouse base, or place hollow concrete blocks level and fill them with concrete.
To avoid water running inside the greenhouse in heavy rain, it is useful to raise the perimeter a few centimetres above the level of the outside ground.
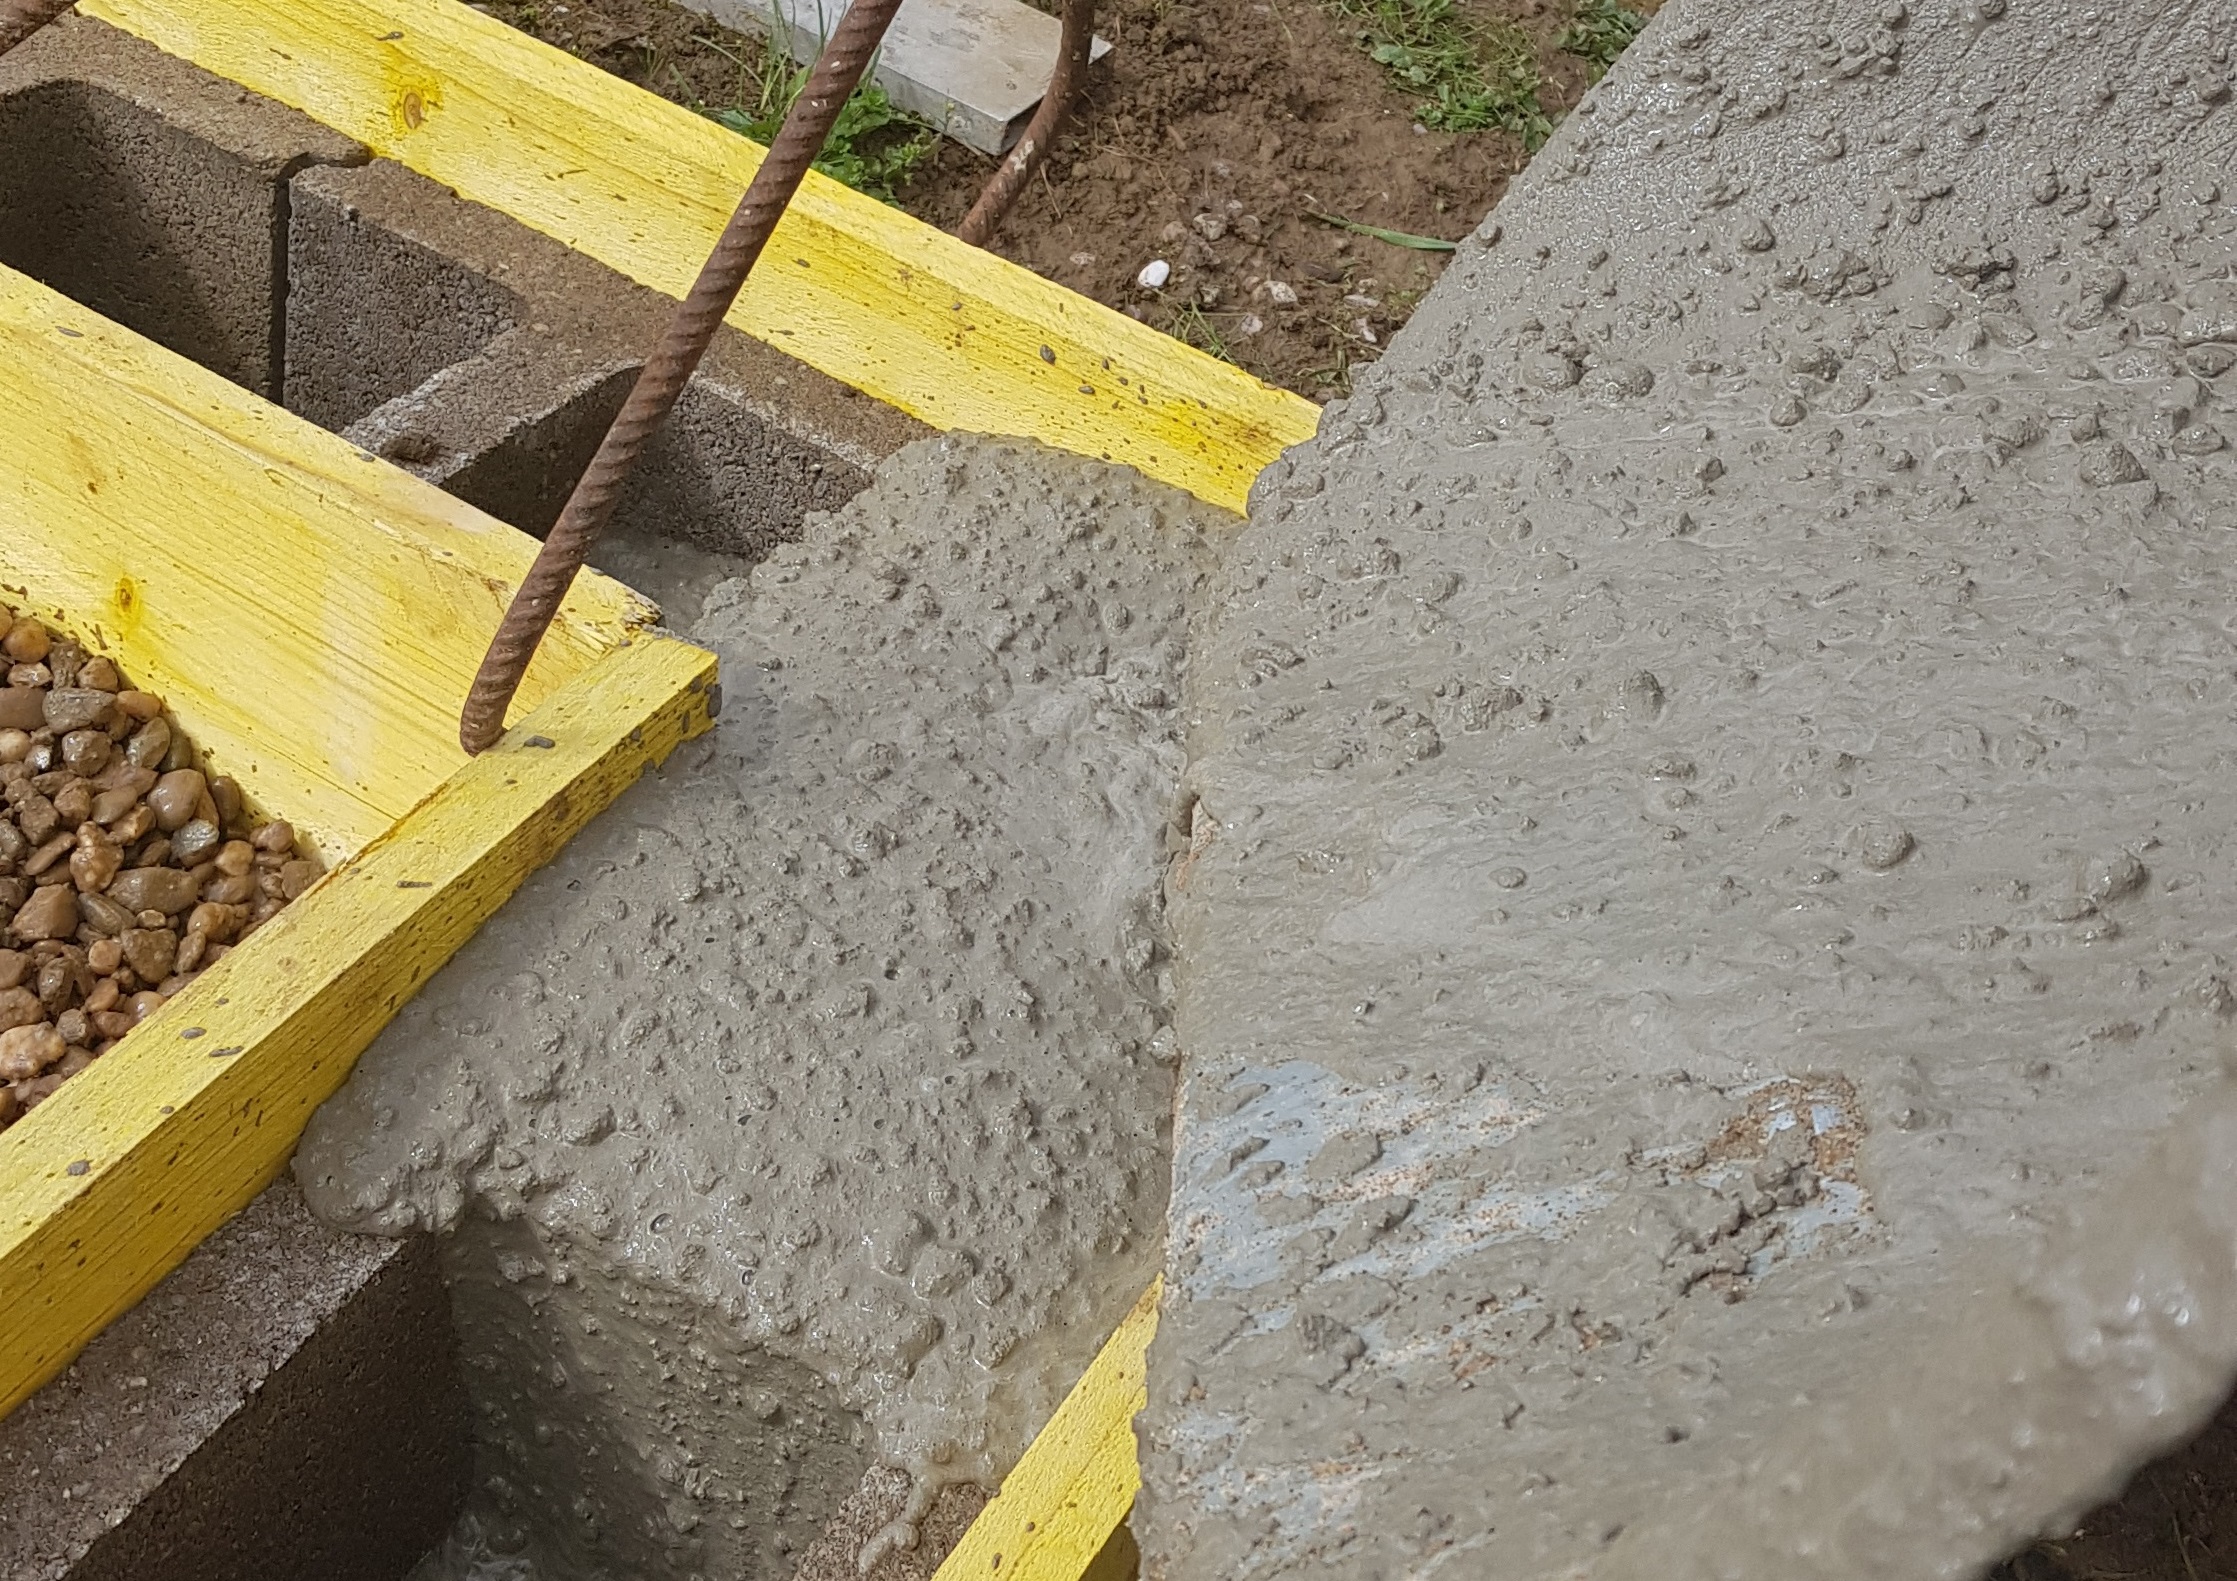
Smooth concrete poured into 20 cm wide formwork blocks
8. Prepare the location of the tanks
The central section with the wooden structure must rest stably across its entire surface. It is essential to prepare a level area with a solid, non-rotting material. Ideally, a concrete island should be prepared to safely support the tanks and their structure.
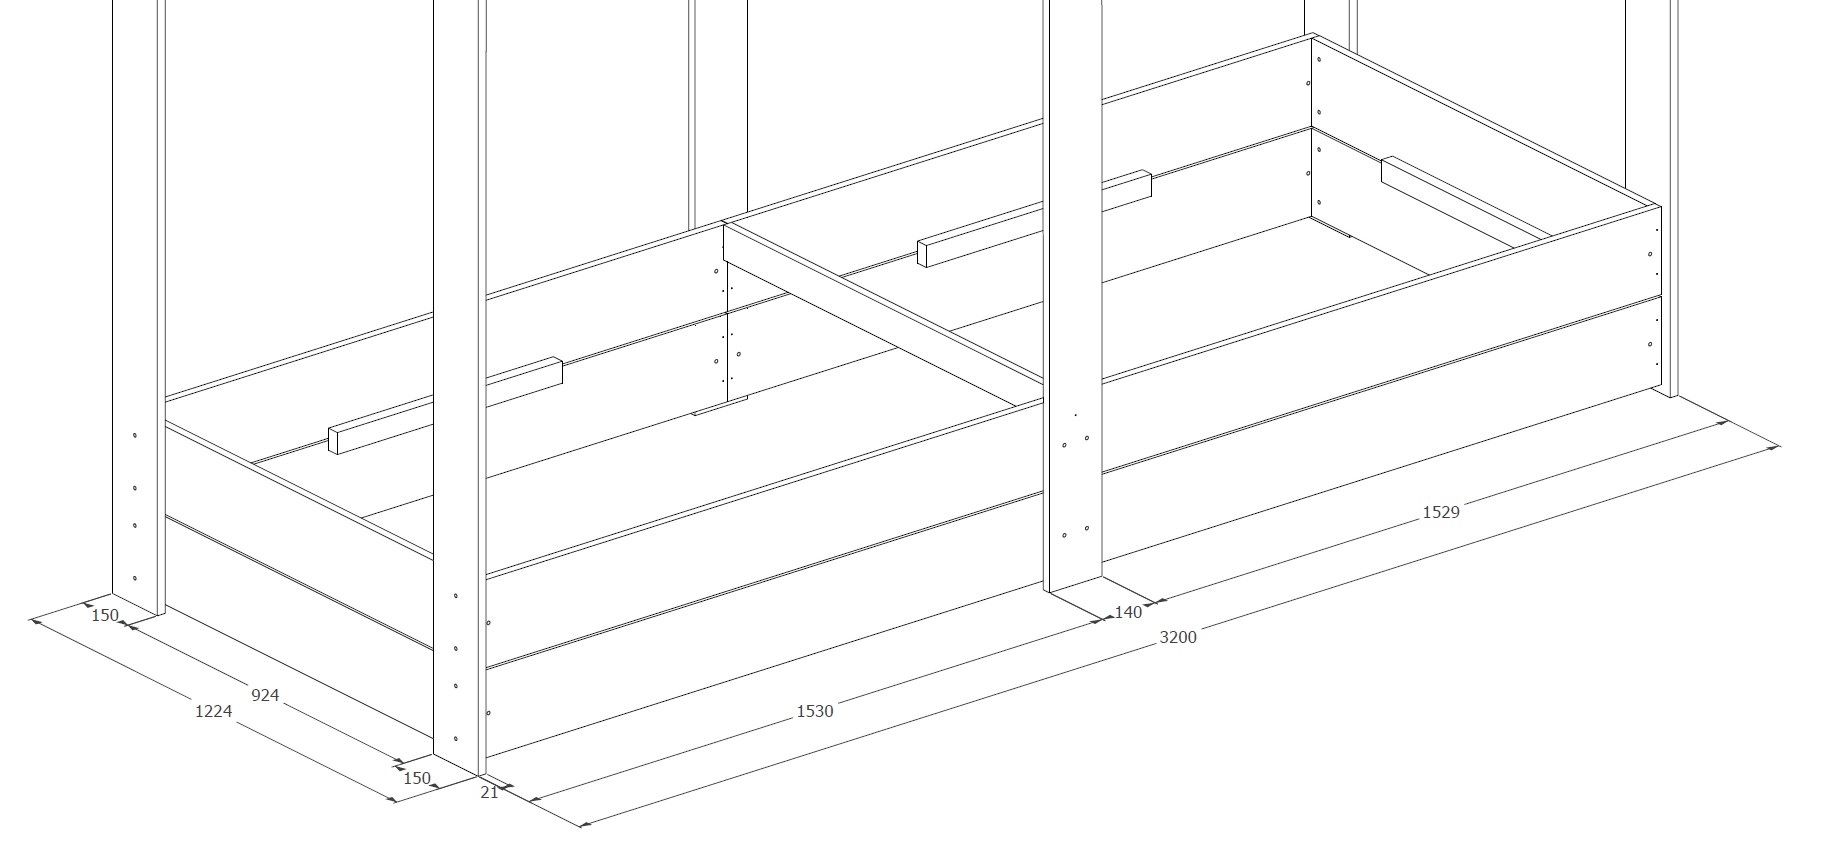
Location of the legs of the wooden structure.
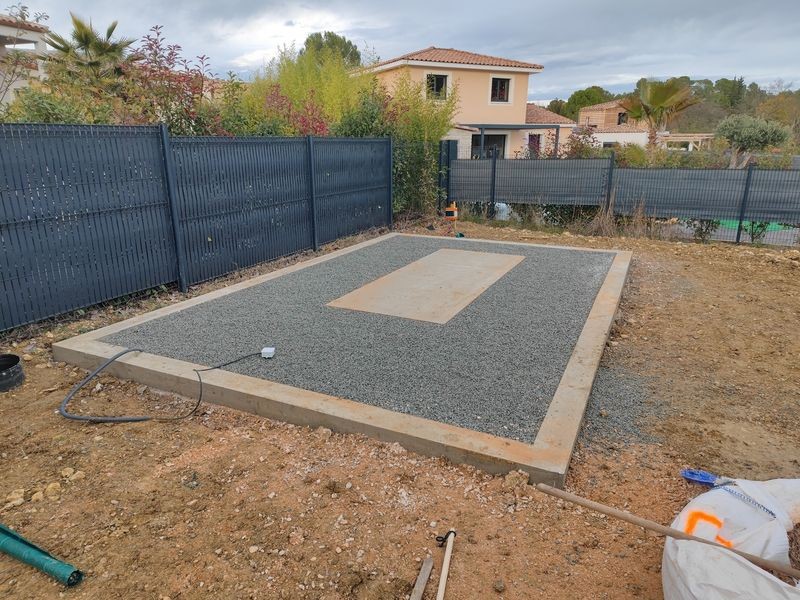
Concrete ring beam and central island
9. If installing a wooden floor
The floor supports must rest on a perfectly level surface across the entire greenhouse area. It is therefore mandatory to create a smooth, full slab or fill the inside of a concrete perimeter with gravel after laying a geotextile sheet.
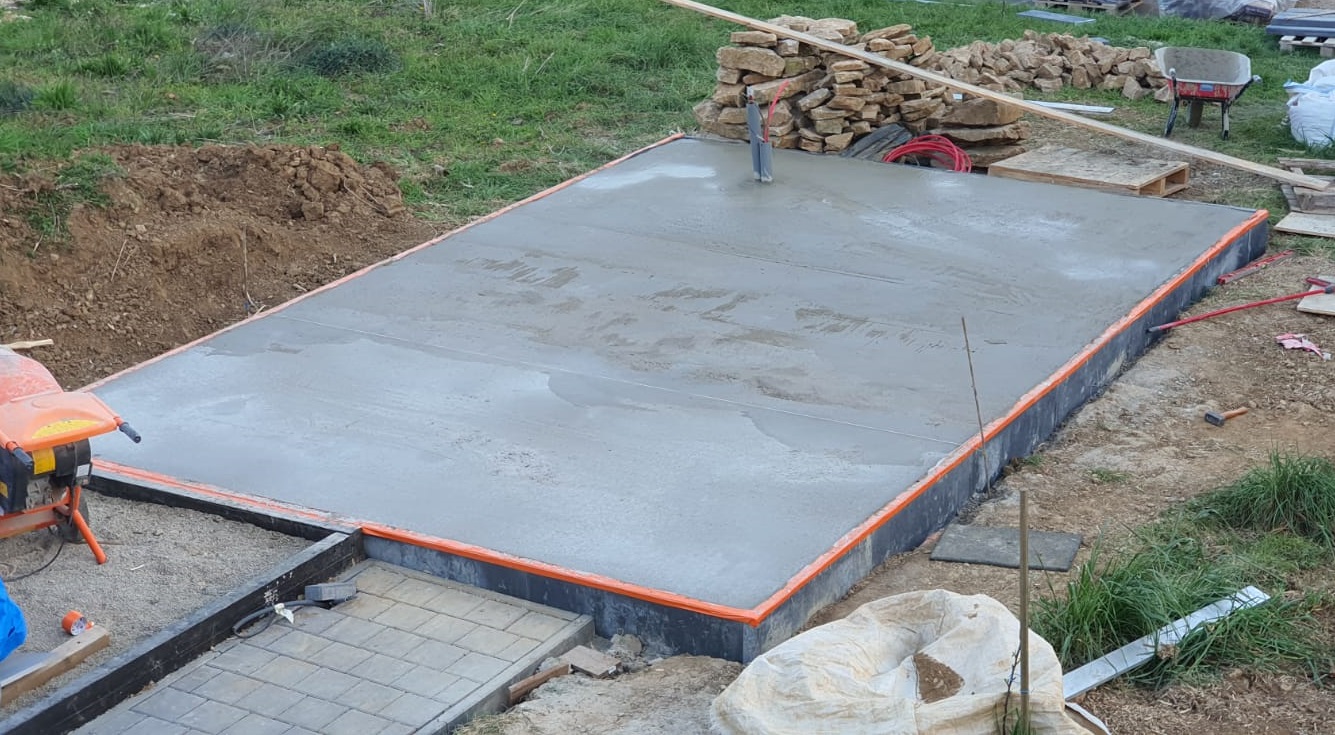
Solid concrete slab (minimum thickness 12 cm with metal reinforcement, i.e. approximately 3m3 of concrete)
For full slabs, water and moisture can be drained from inside the greenhouse by means of one or more drains to the outside. It is important to respect the indicated dimensions to avoid large amounts of rainwater running in from outside.
Also, if there is no collector, the greenhouse roof water must be drained to the outside of the concrete area (32mm plastic pipe).
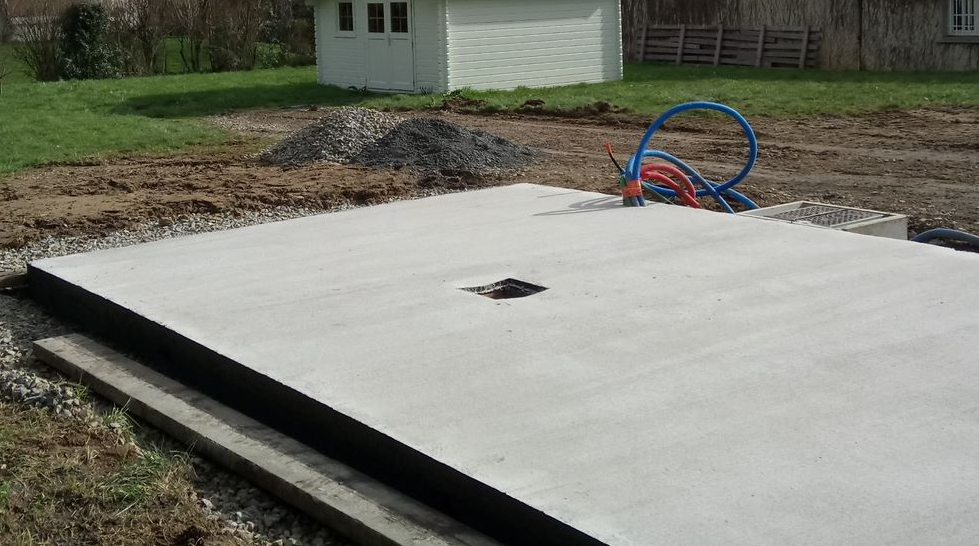
Water drainage to the outside.
Electrical supply when creating a concrete slabThe electrical supply must be located inside the greenhouse. You must therefore remember to leave an electrical conduit before pouring the concrete, or cut a channel afterwards.
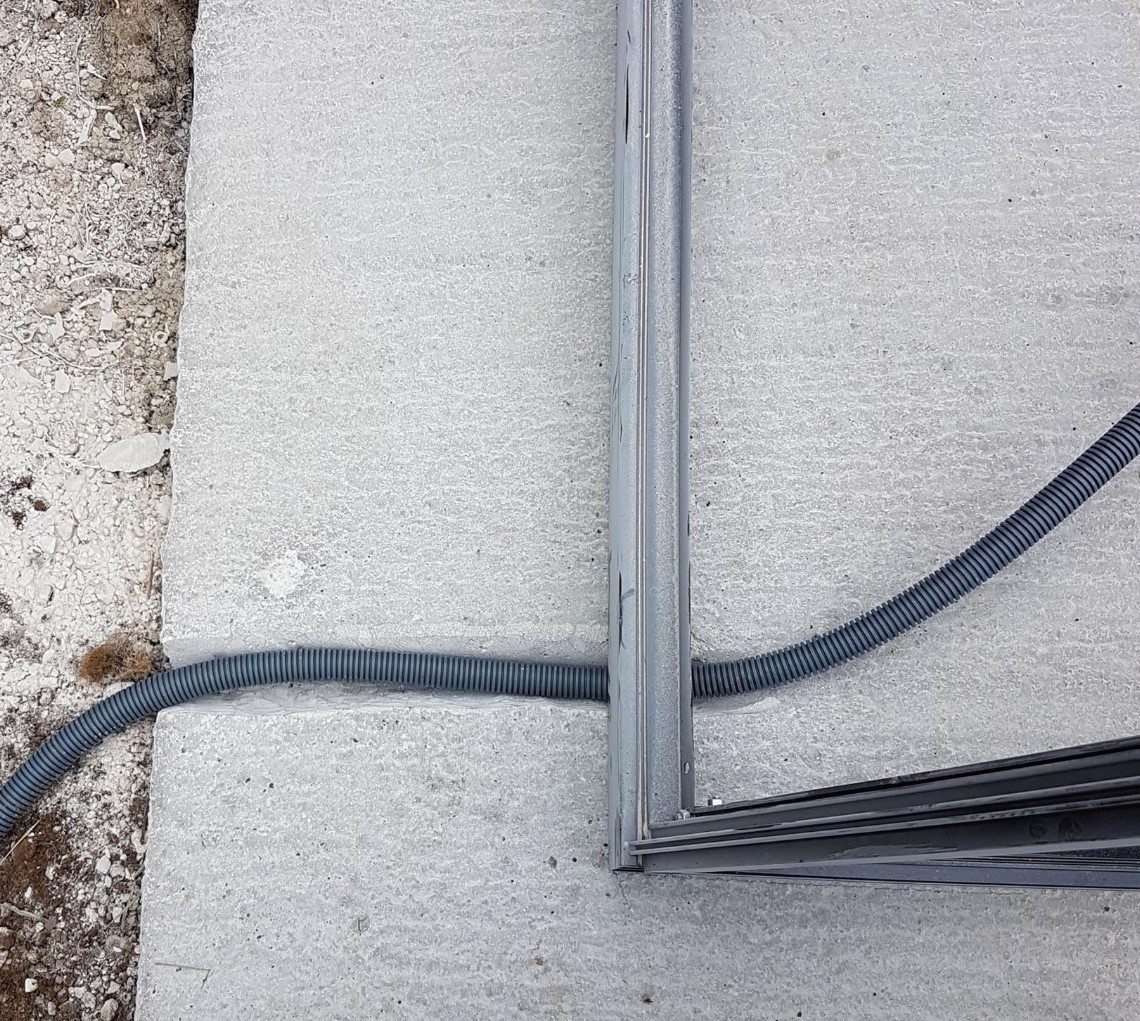
Routing of the supply line through a chase.
10. If installing on an existing concrete slab
To avoid large amounts of standing water under the greenhouse during rainfall, the greenhouse base must be sealed during installation (CompriBand seal or silicone).
Also, channels must be cut in the concrete area around the greenhouse to limit water circulation under the structure.
11. Installation on a wooden structure and screw-pile foundation
It is possible to carry out earthworks with foundation screws. An assessment is required beforehand to validate the feasibility of the installation (ground type, presence of rock in the soil) through a ground survey, installation of stakes and pre-drilling of the ground.
Above the foundation screws, a wooden structure allows the greenhouse to be anchored across its entire base.
Service on quotation. Cladding and access ramp to the greenhouse not included.
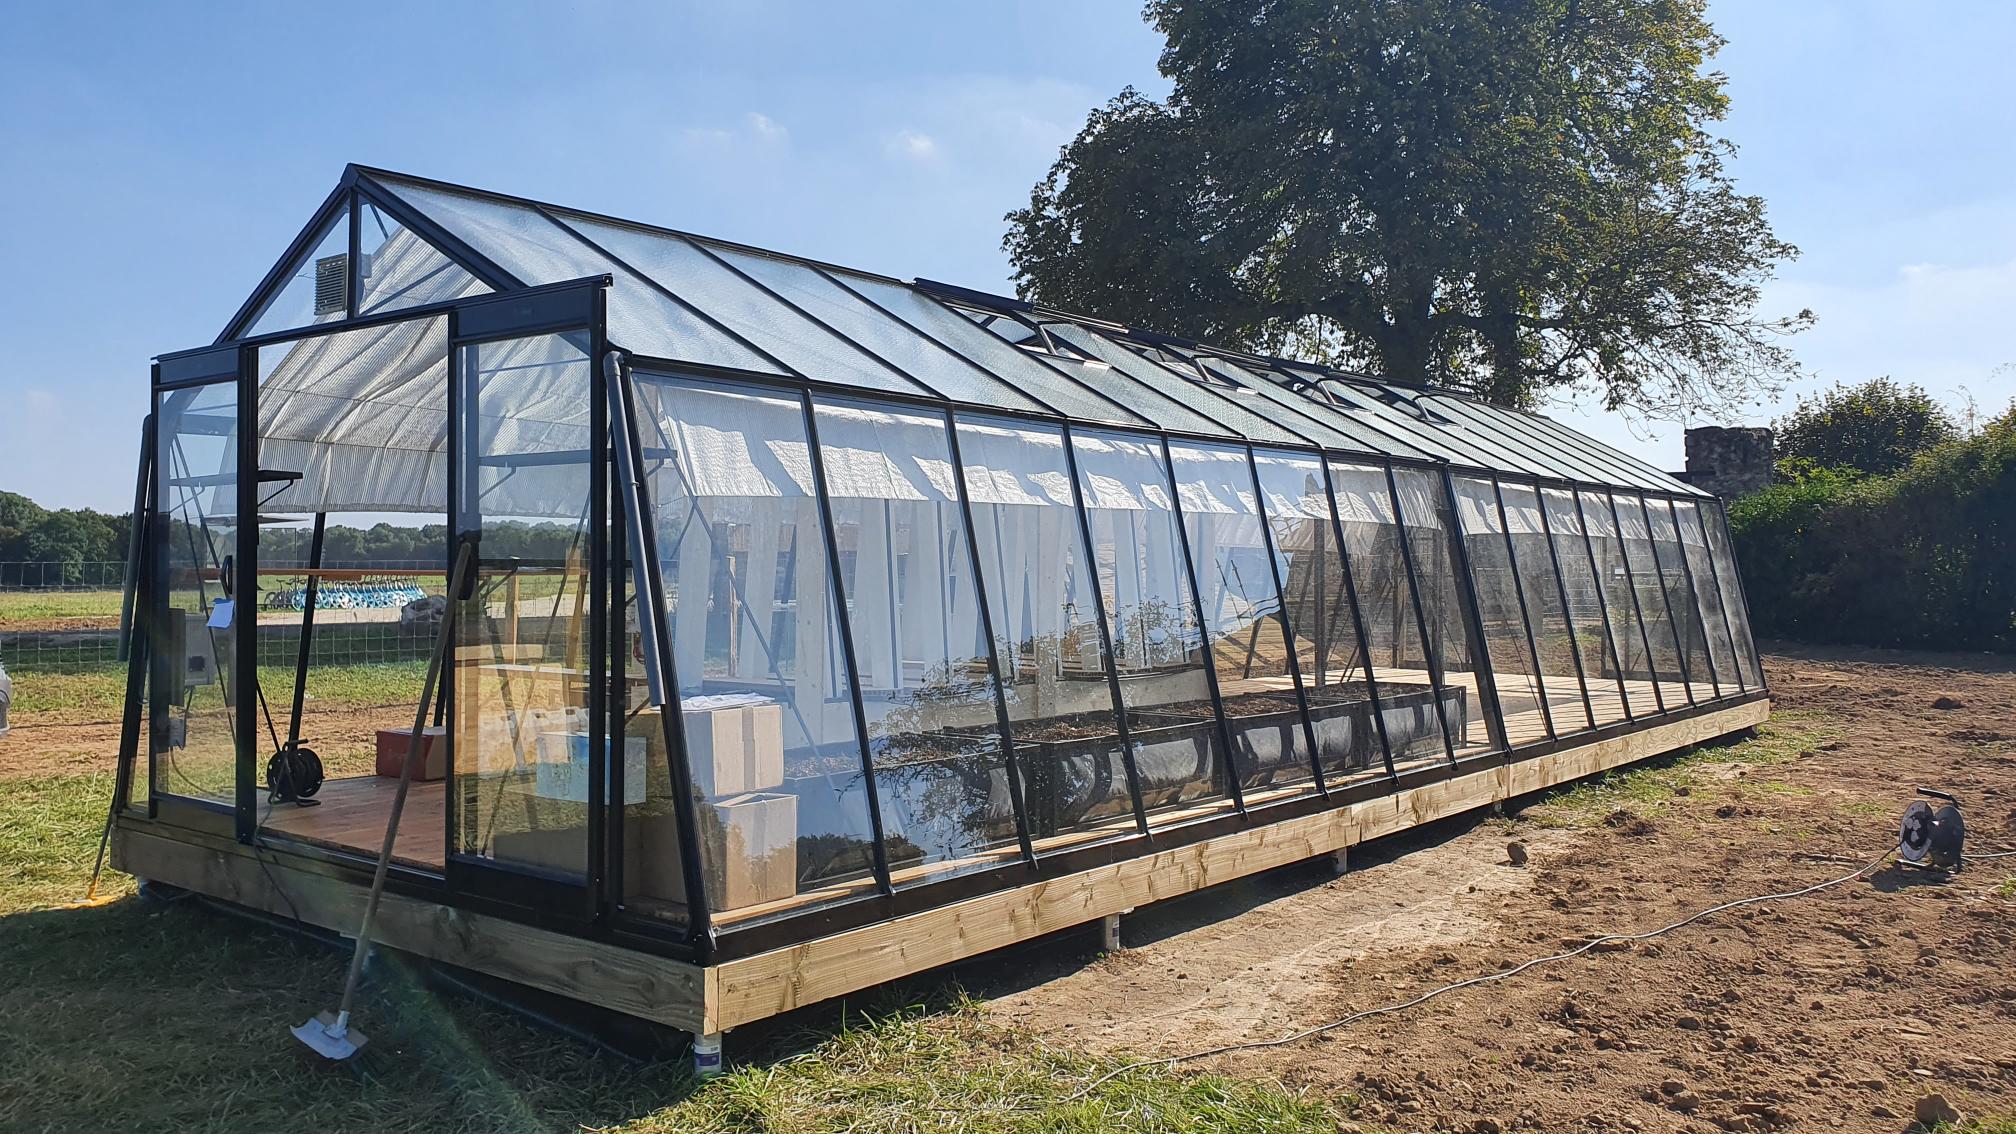
Family44 with equipment
12. If installing a City model
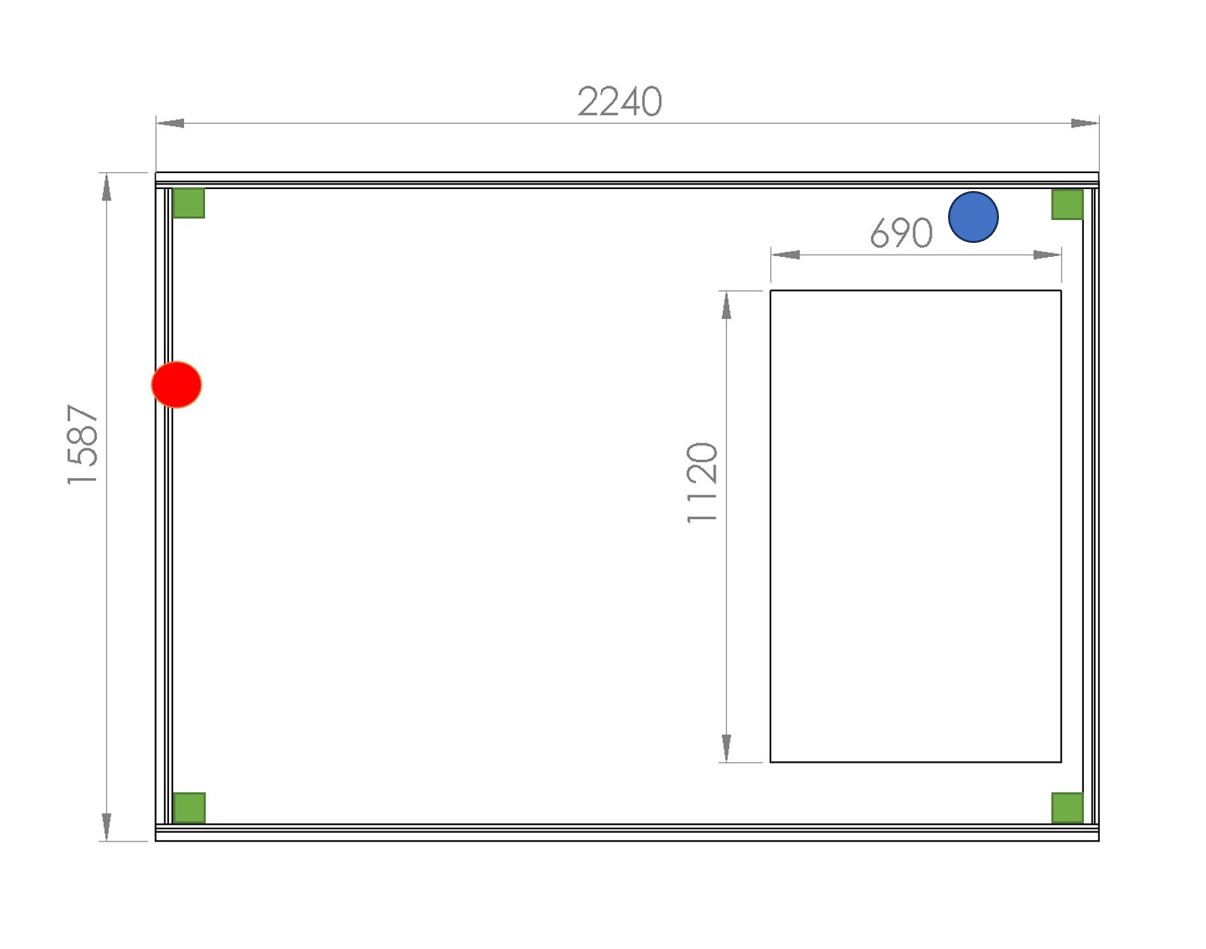
In red, electrical supply. In blue, recommended water supply.
In green, anchoring. Dimensions in mm. Inside, the structure of the tanks.
The earthworks constraints are less strict for a City model.
The concrete perimeter or full slab are optional. However, make sure the entire levelled surface is properly compacted.
13. If installing water collectors
It is possible to install water collectors at one end of the greenhouse, at the lowest point. To make levelling easier, provide a flat, reinforced surface of 560*360mm.
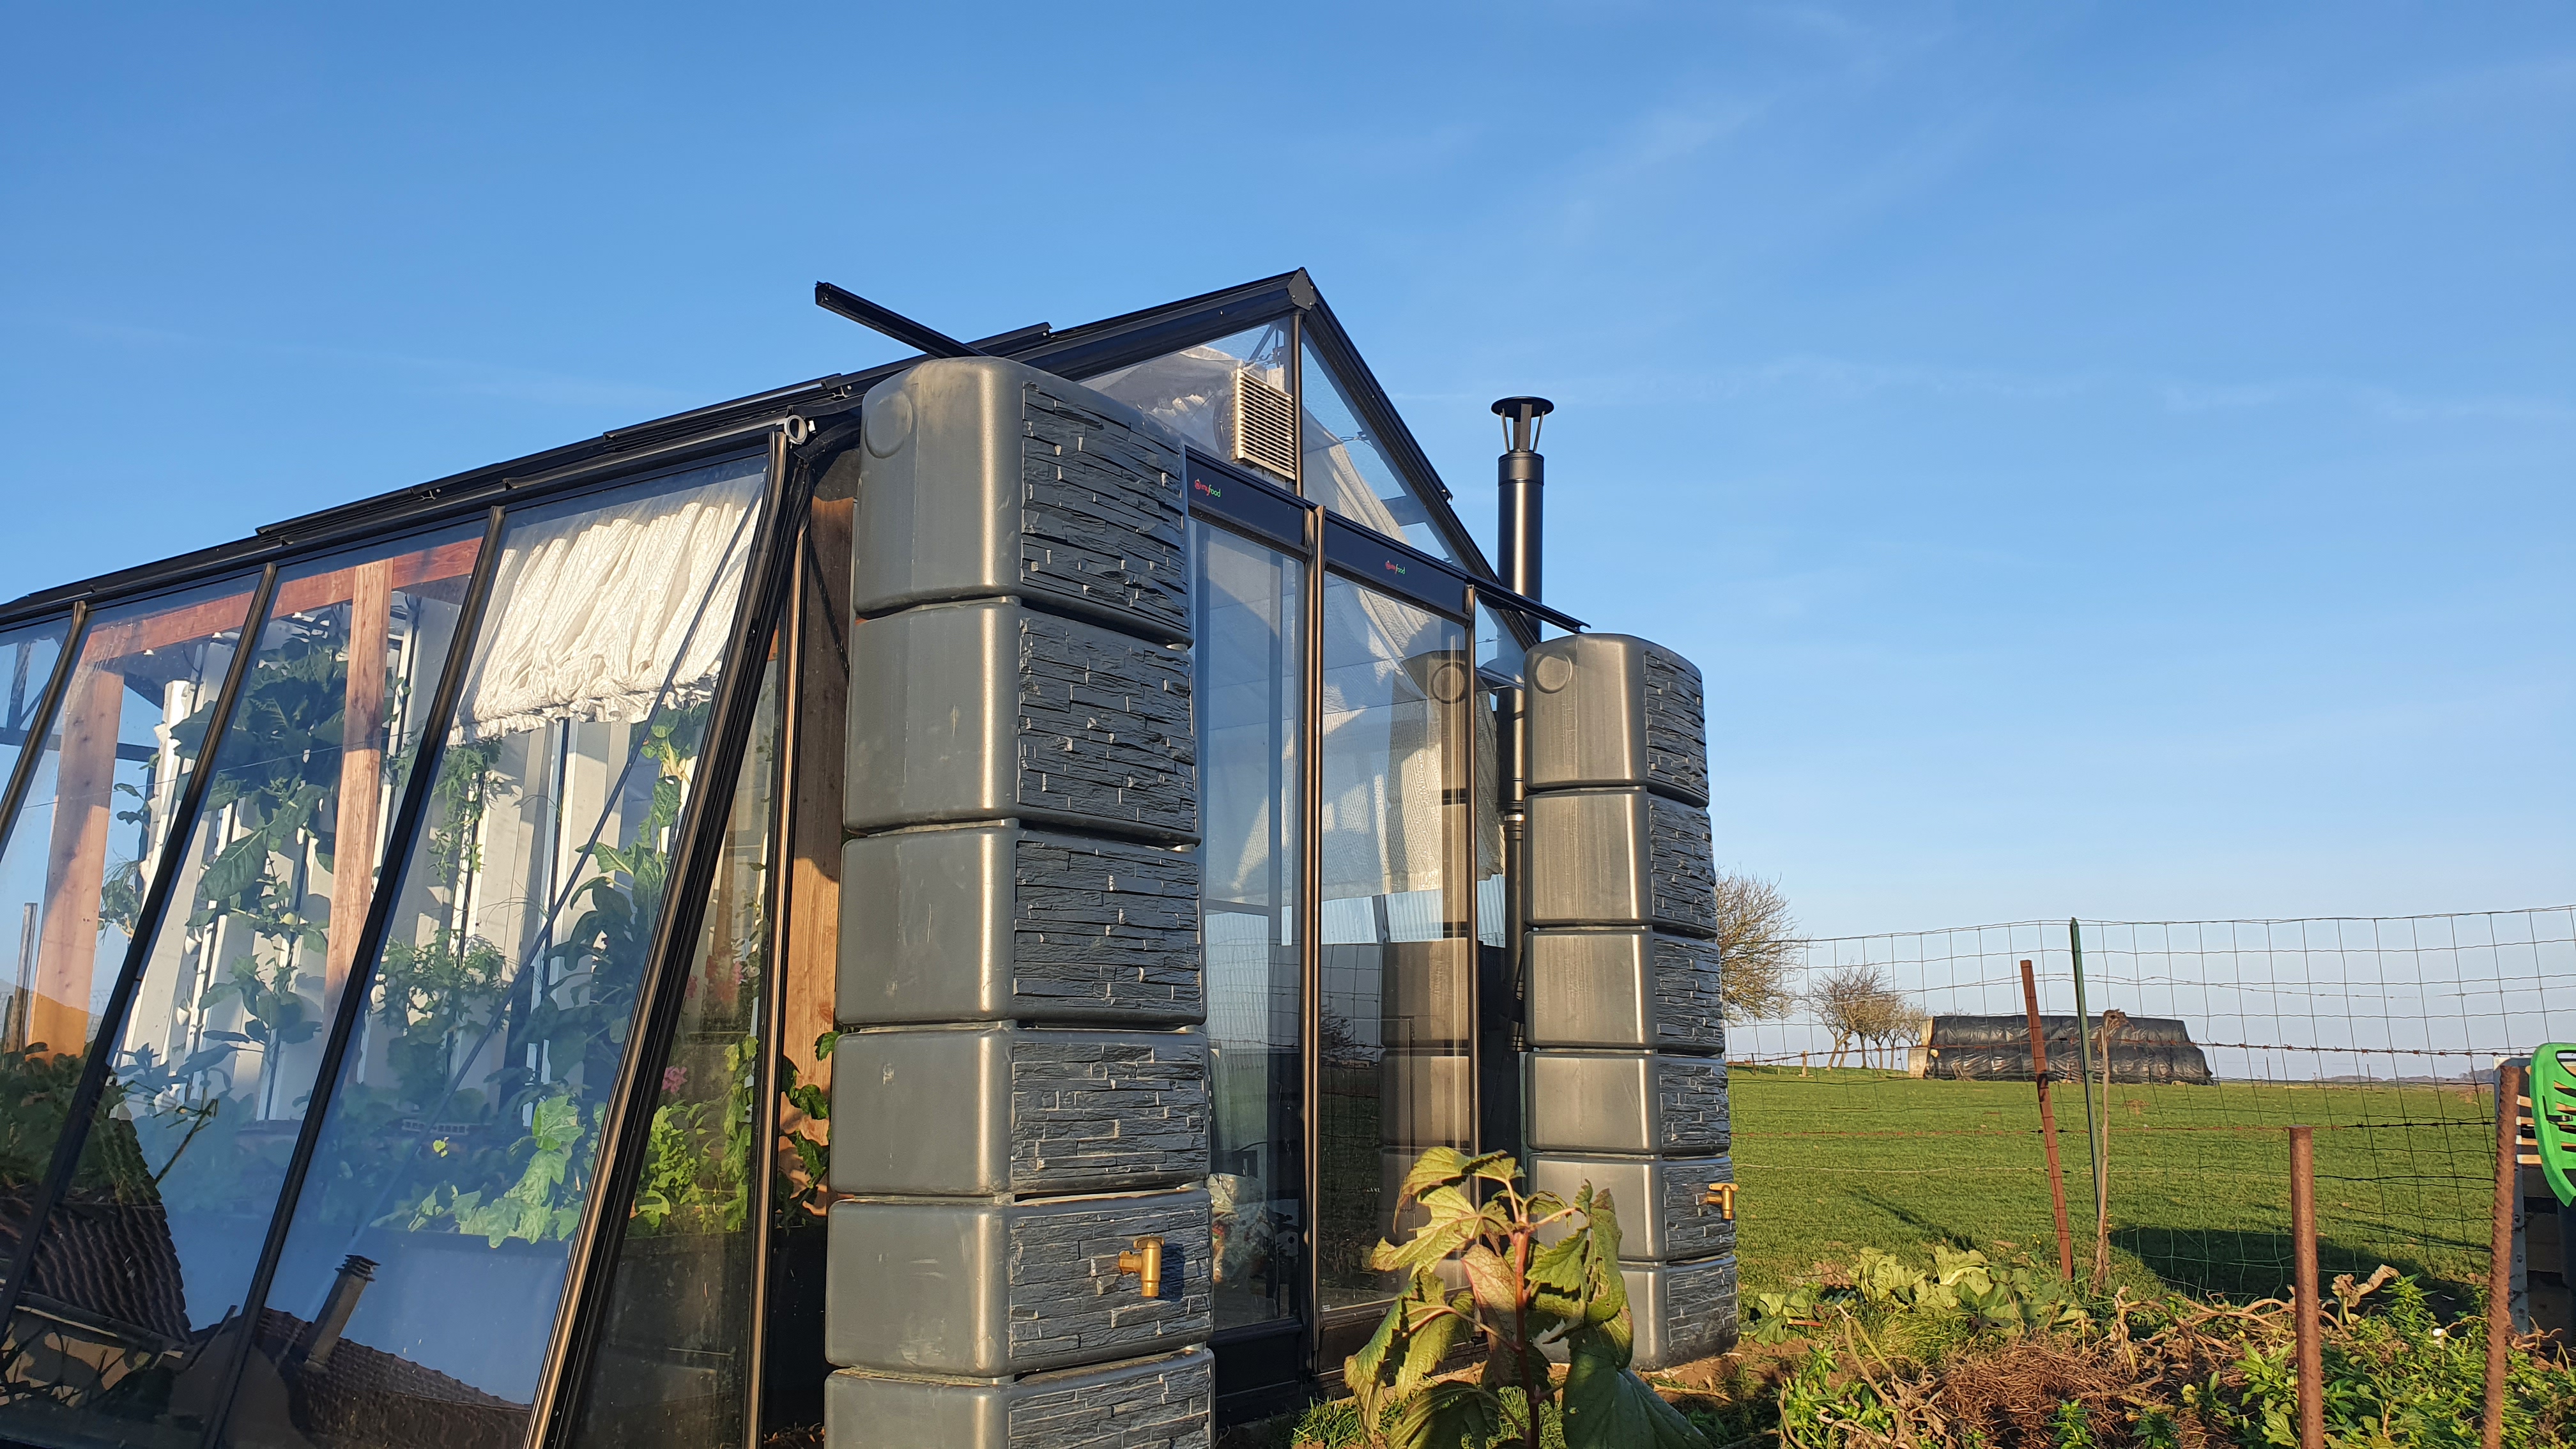
Double water collector (2*300L)
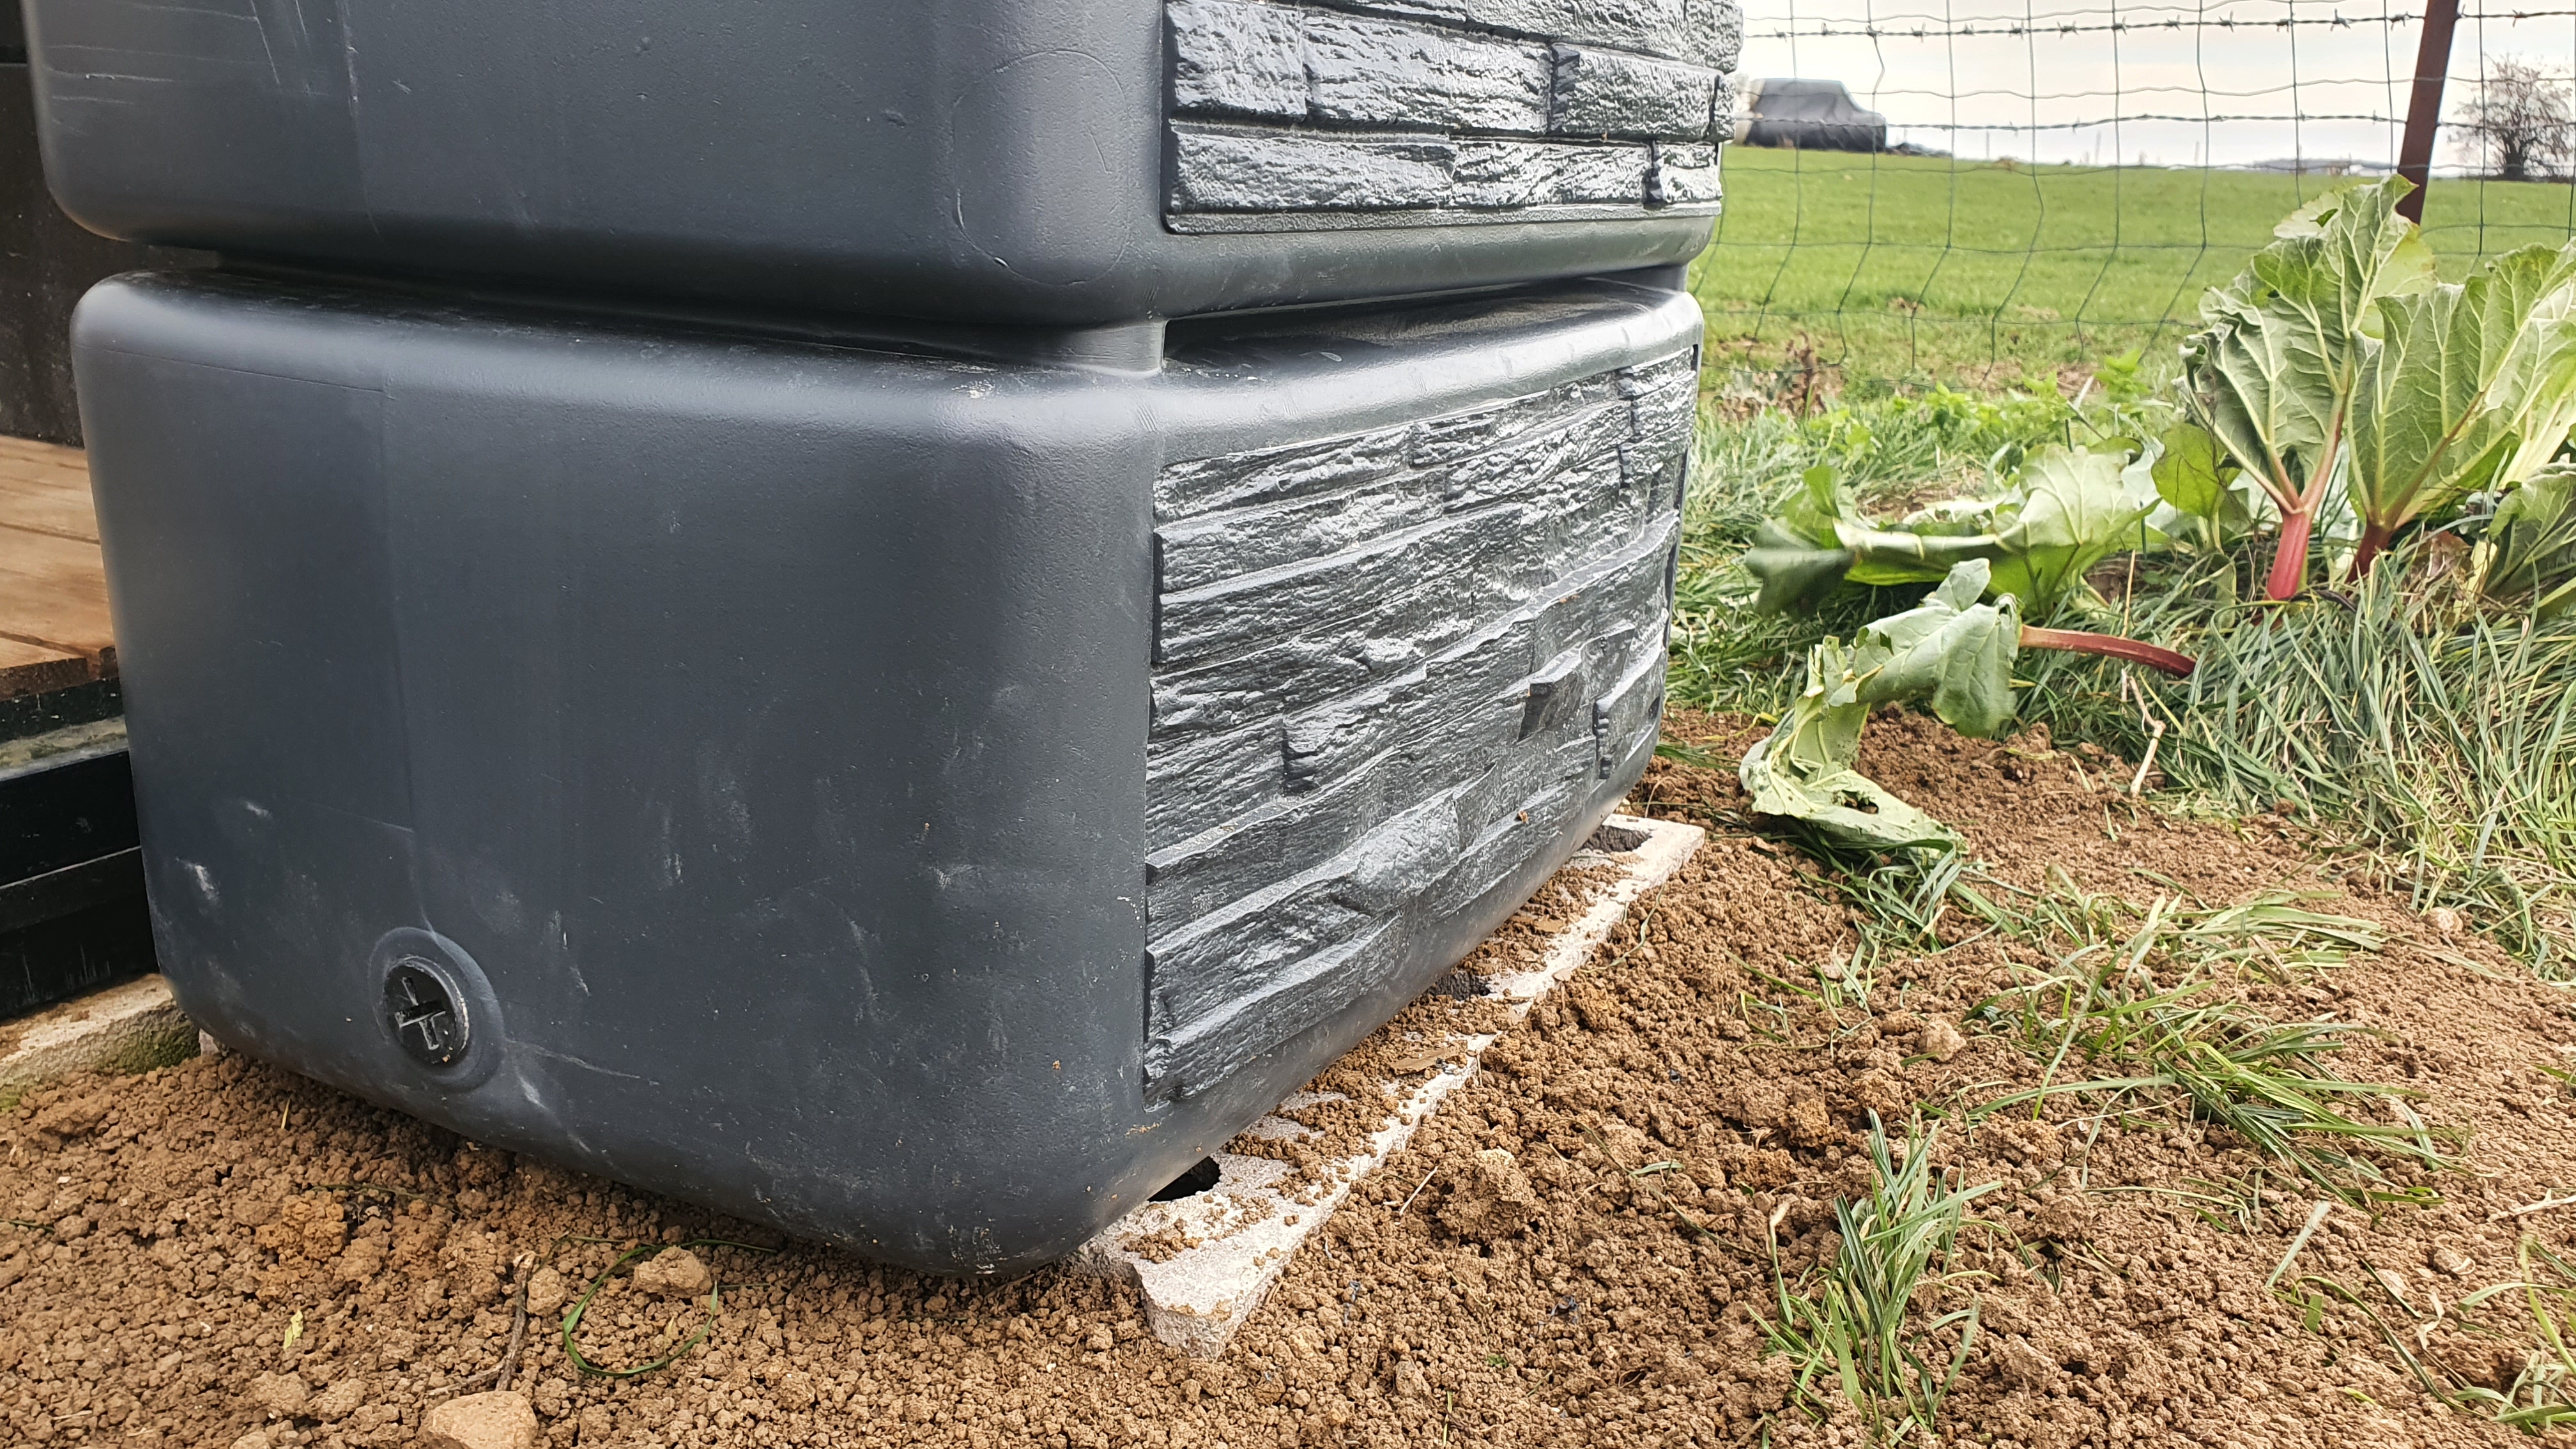
It is possible to use concrete blocks or concrete edging to ensure the stability of the water collector.
Updated 8 days ago