
Cultivate spirulina
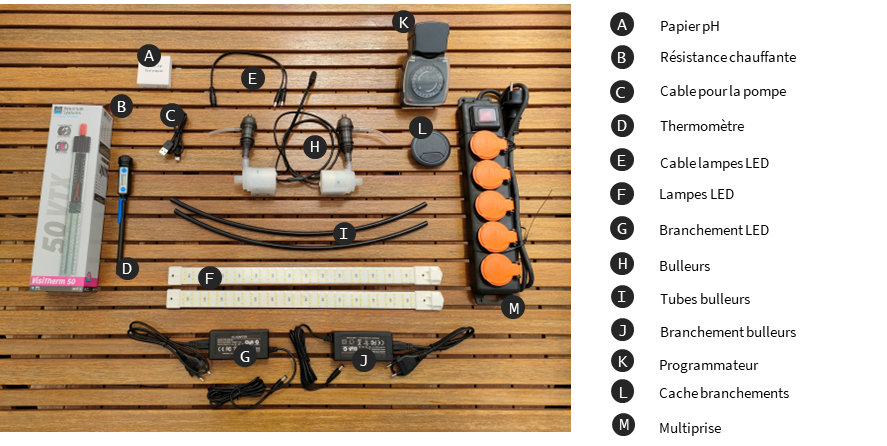
Components required for installation
Installing the module
The module has the same footprint as a permaculture bed (size M) and occupies a floor area of 0,8 m².
It should be placed in your greenhouse (or in a bright area of your home), near an electrical outlet.
The module is delivered with:
– a support cabinet to assemble (See the spirulina cabinet assembly instructions);
– a technical box (also to be assembled) containing all the cultivation, harvesting and maintenance equipment;
– two 100 L cultivation tanks;
– one bottle of concentrated spirulina (delivered when the module is ready to be assembled);
– the essential nutrients for feeding the spirulina.
If you have chosen installation of the module by Myfood, the cabinet will be assembled and installed in the greenhouse. The technical box and the two tanks will be placed on the support cabinet. Instructions will be provided for installing the cultivation equipment and starting spirulina cultivation.
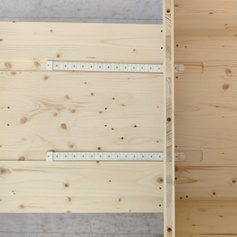
Before screwing the technical box onto the support cabinet, place the LED lamps in the cabinet slots provided for this purpose. The plastic part used to connect the LED lamps must be inside the technical box.
Cleaning the equipment
Wash your hands. Disinfect all cultivation equipment with alcohol vinegar, then rinse with water:
– the cultivation tanks and their lids;
– the heating elements;
– the air pumps / aerators and their hoses.
Setting up the lighting system
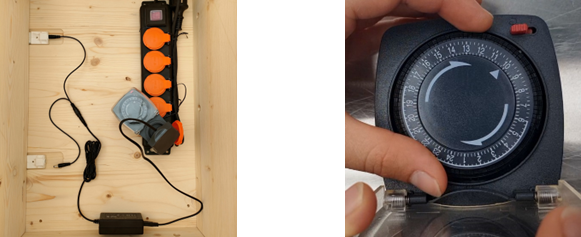
Connect the LED lamp of the first tank to the timer using the cable and the LED connection. Plug the timer into the power strip inside the technical box.
Recommended timer setting to optimize productionDay: 16h (e.g.: 6am to 10pm) / Night: 8h
After setting it, switch the timer to automatic mode (red button on the right side of the clock).
Setting up the heating system
Place the two tanks on the cabinet, above the central legs.
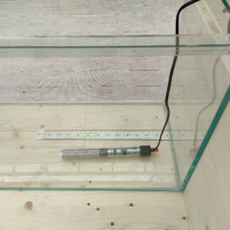
Set the heating element to 30°C. Place it horizontally at the bottom of the tank.
Only plug in the heating element once it is completely submerged in water.
Setting up the aeration system
Connect the black tubes to the transparent hoses of the air pumps / aerators. Connect the air pumps / aerators to the designated connector. Insert both air pumps / aerators into the first tank.
Since the two air pumps / aerators are connected together, they cannot be switched on separately, which is why they are initially placed in the same tank.
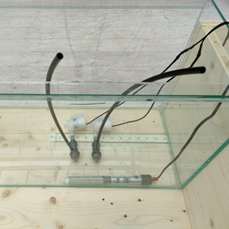
Filling the tank with water
Fill the tank with 10 L of drinking water (tap water or borehole water tested as drinkable).
Plug in the power strip connected to the timer to switch on the first LED lamp. Plug the air pumps / aerators into the power strip. Plug the first heating element into the power strip.
Preparing the culture medium
Use the tank water to dissolve 120 g of nutrient salts and 50 g of fine table salt in a disinfected container.
Adding hot water makes dissolution easier.
Once the salts are fully dissolved, pour the solution into the cultivation tank.
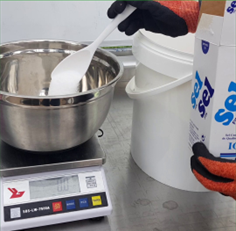
Do not use hot tap water to help dissolve the salts: it contains more bacteria than cold water.Preferably use cold water heated in a kettle or saucepan.
Beware of the fumes released during dissolution. Nutrient salts must be handled with gloves.
Adding the inoculum (concentrated spirulina culture)
When the temperature has exceeded 20 °C and the salts are completely dissolved, add the 1 L spirulina inoculum to the tank.
Close the tank with the lid to limit evaporation from the medium.
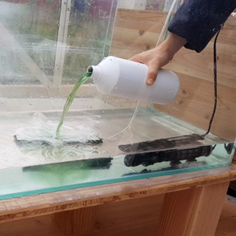
Increasing the spirulina culture volume
When the tank is well concentrated with spirulina (secchi < 5 cm), prepare more culture medium in a clean container. To do this, dissolve 12 g of nutrient salts and 5 g of fine table salt per litre of added water. You need to roughly double the volume of water in the tank.
Once the salts are dissolved, pour the solution into the tank and let the spirulina grow.
Repeat this operation as many times as necessary to completely fill the tank. Each time, check that the spirulina is sufficiently concentrated before doubling the water volume.
This step can take several weeks.
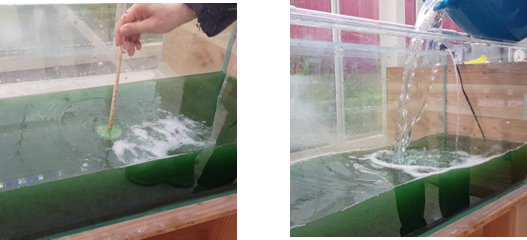
Filling the second tank
When the first tank is completely full and well concentrated, disinfect the empty tank with vinegar and rinse with water. Also disinfect the unused heating element and diffuser.
Place the unused heating element at the bottom of the empty tank. Transfer half of the contents of the first tank into the second tank using a pump or a disinfected bucket. Plug in the heating element.
Unplug the air pumps / aerators so that one can be moved into the second tank. Plug the air pumps / aerators back in.
Top up both tanks to the top with fresh culture medium (12 g of nutrient salts and 5 g of fine table salt per litre of added water).
Plug in the second LED lamp.
Close the tanks with the lids and place the black air pump / aerator tubes in the holes provided in the lids.
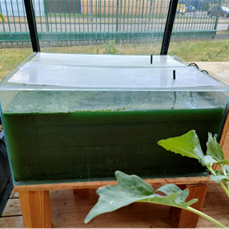
Fill the tanks as much as possible, up to approximately 4 cm below the top of the tanks.
Once this operation is complete, installation of the microalgae module is finished.
Carry out regular maintenance on the tanks: monitor your spirulina daily.
Before harvesting:Check the secchi.
After starting cultivation in a tank, allow around ten days before the first harvest.