
Cleaning the filtration system
Simplified maintenance with a high-performance filter.
In this video, you will see a step for cleaning the sieve foam, a green foam. Following an upgrade to the irrigation system, this foam was removed.
Good to knowRecommended cleaning frequency: every week
Minimum cleaning frequency: every 3 weeksA good indicator of clogging is the small orange propeller at the filter outlet.
1. Cleaning the radial filter
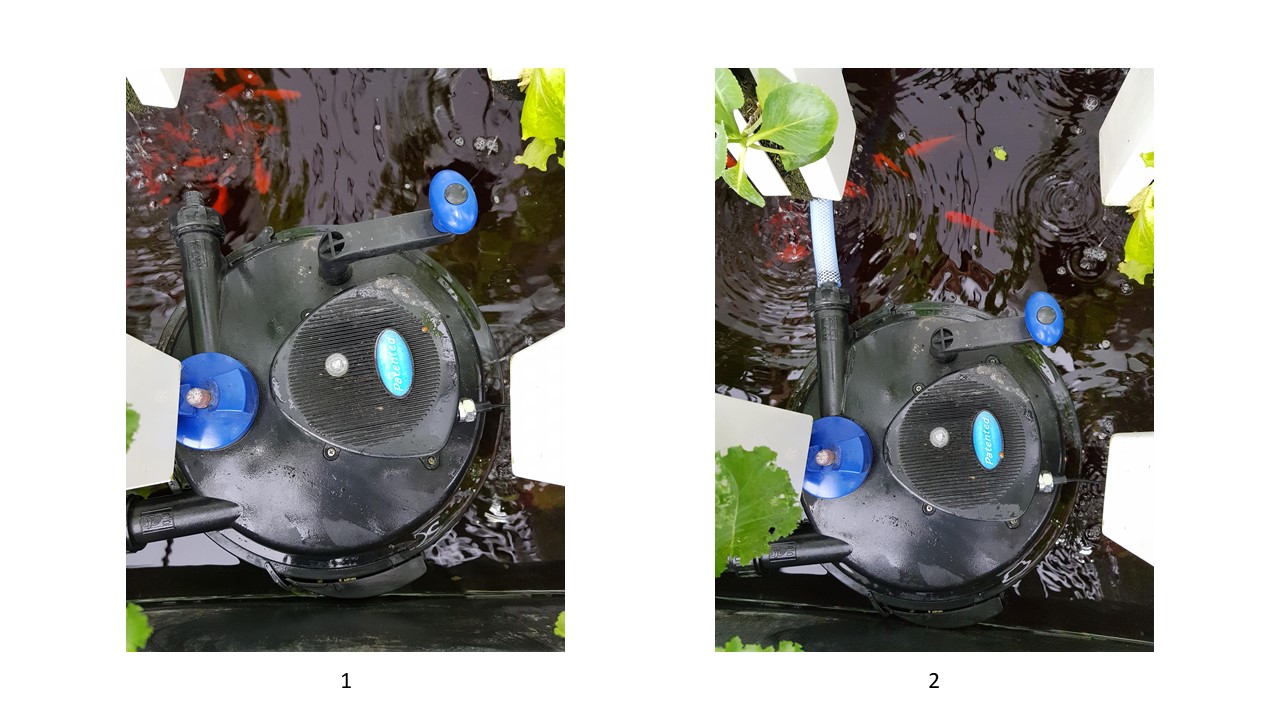
- Put the handle in its slot (1).
- Insert the hose at the water outlet (2). Direct it into a bucket, into a permaculture bed or into your water reserve.
- Reduce the water flow to the pump minimum (on the control box by pressing "-")
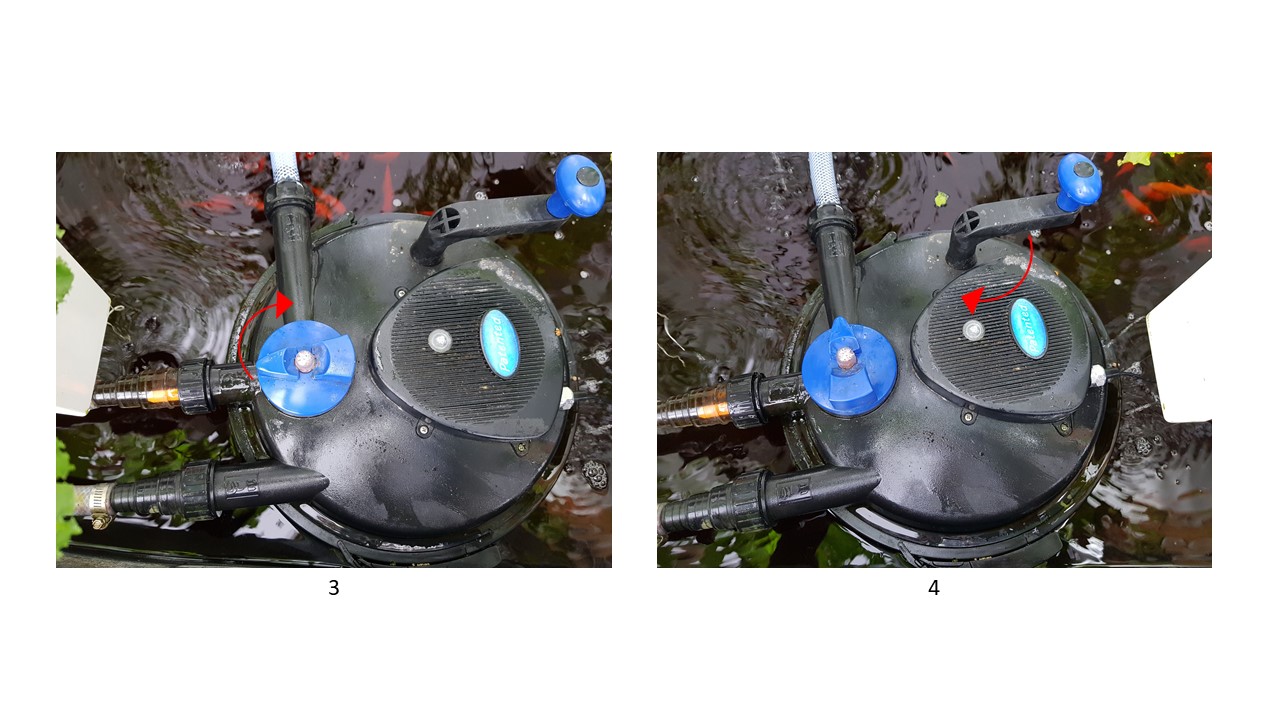
- Turn the diverter (3) and operate the handle (4) until the water clears.
- After cleaning the filter, return the diverter to its initial position.
- Increase the water flow back to maximum
In addition: bleed the systemOpen the bleed valve (using the small red valve) gradually to release any air bubbles that may be trapped in the system.
2. Cleaning the inside of the radial filter
Twice a year, it is useful to clean the inside of the radial filter, especially if the flow indicator propeller turns with difficulty despite weekly maintenance.
You can also remove the filter housing, which is generally filled with organic matter, to clean it.
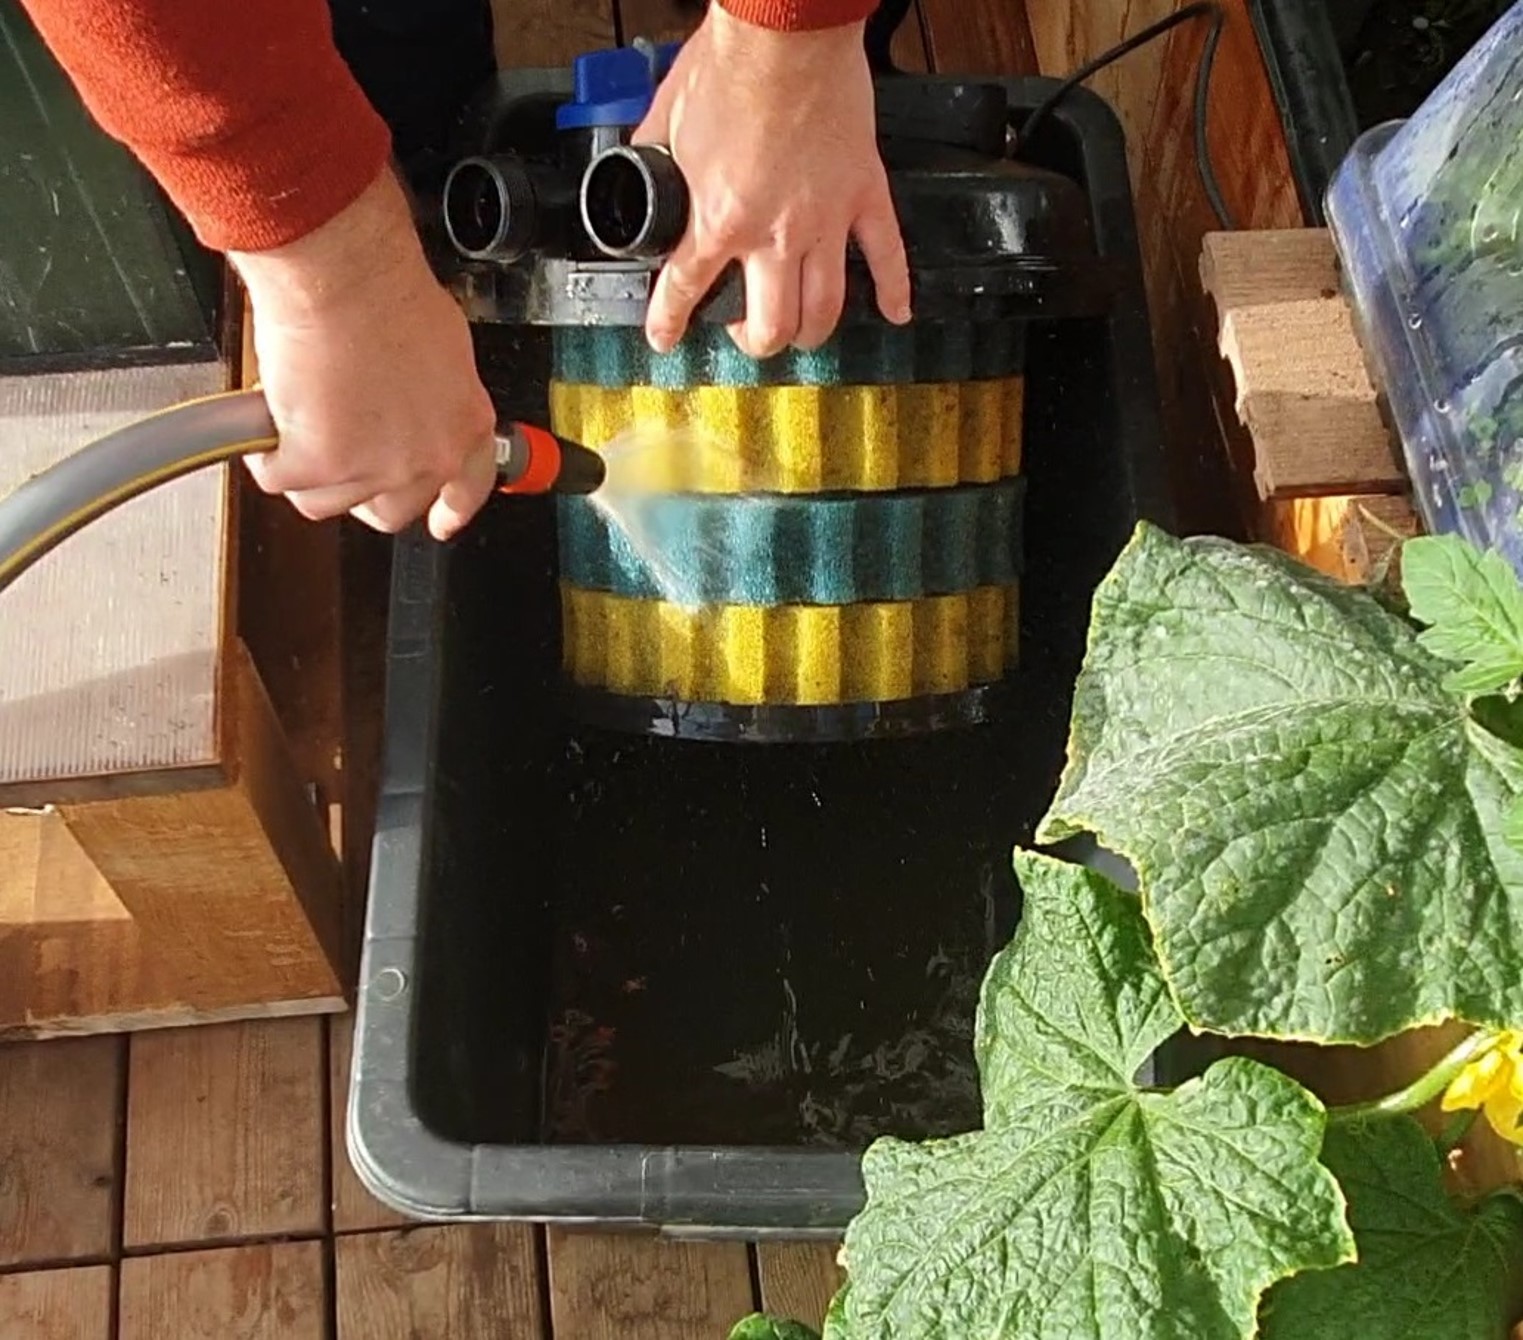
Cleaning the filter foams
The upper part of the filter connected by the UV lamp electrical cable can also be disassembled. It is then possible to remove the filter completely from the greenhouse. Be careful not to overtighten the fixing screws for this part.
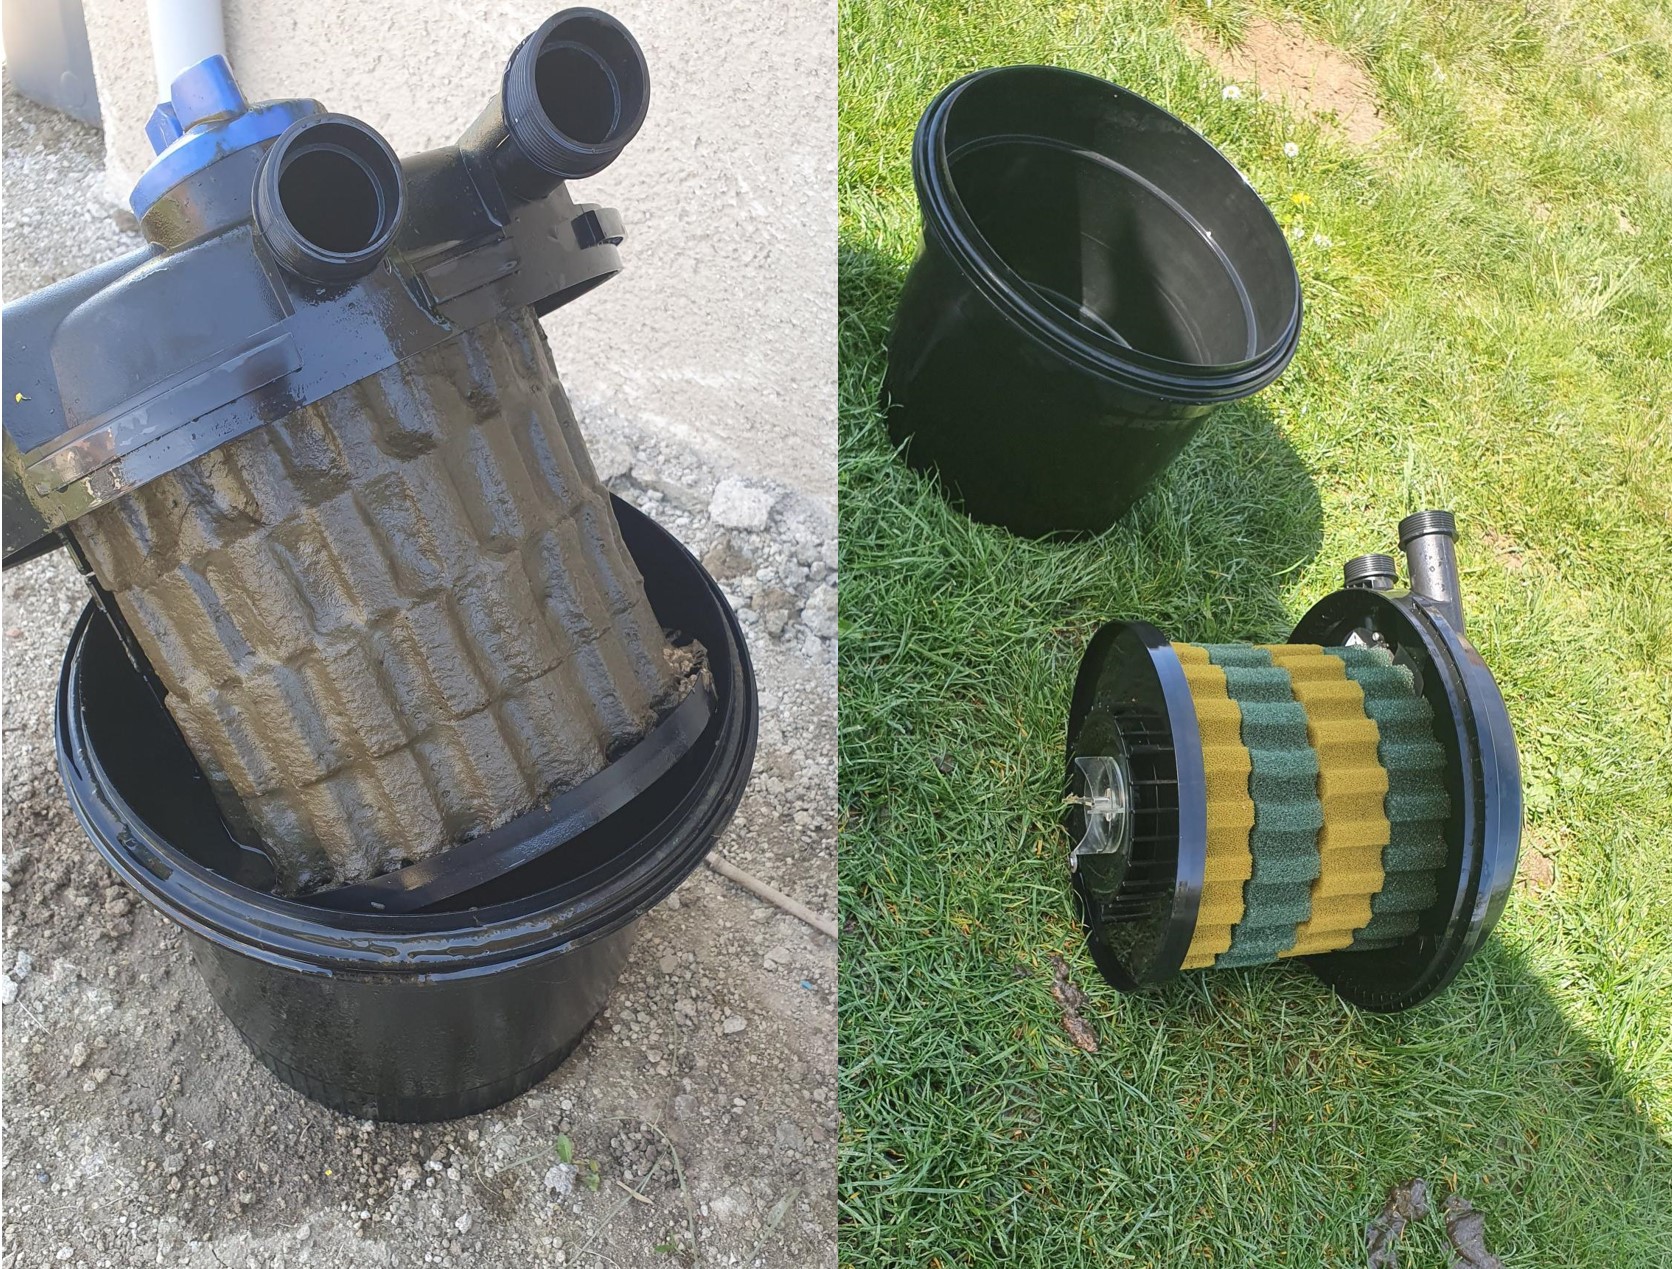
Cleaning the inside of the filter
3. Cleaning/replacing the filter sponges
The steps below allow you to clean the foams or replace them.
- Remove the lid and place it upside down.
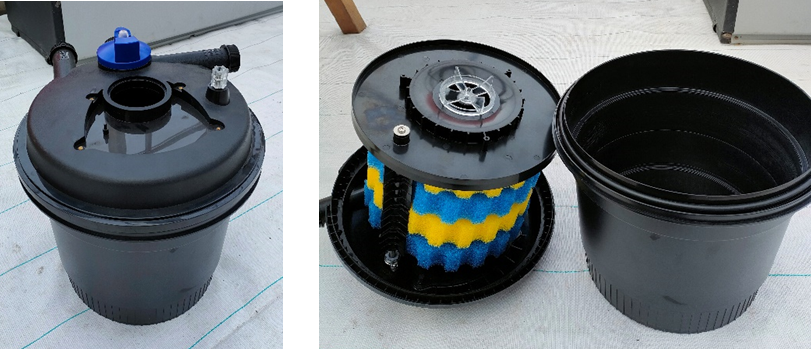
- Unscrew and remove the filter sponge holder.
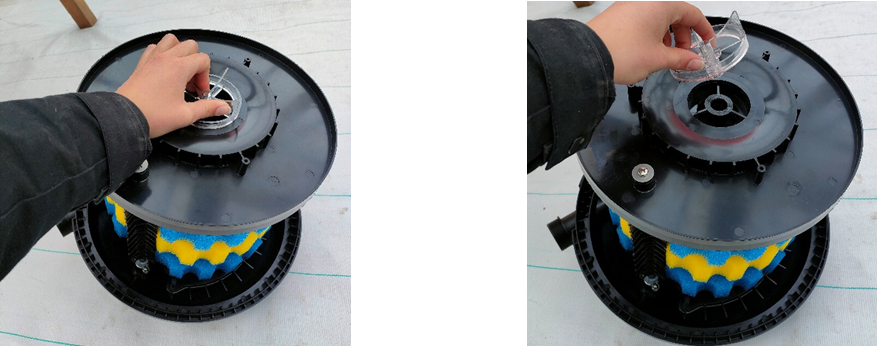
- Using a screwdriver, remove the screw and washer.
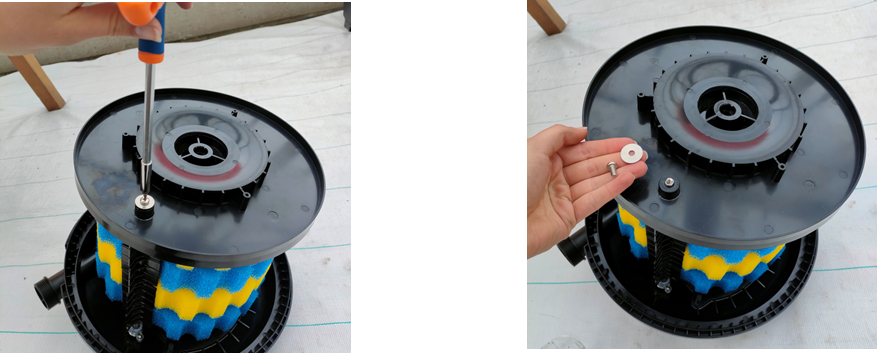
- Remove the cover and the filter sponges one by one, making sure not to change the order of the sponges.
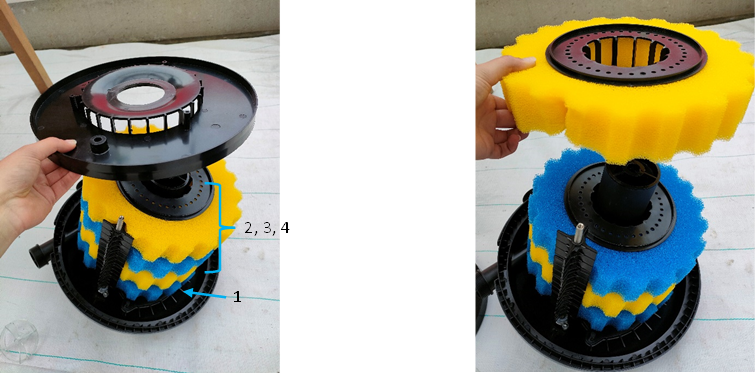
- Take blue sponge number 1 (the one removed last) and separate it from its central support by sliding the foam off the part.
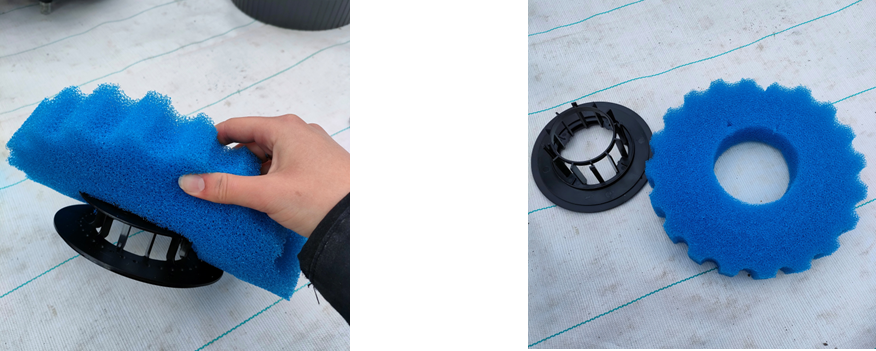
- For sponges 2, 3 and 4, press the 4 tabs to unclip the upper part of the support and thus remove the entire plastic central part from the foam.
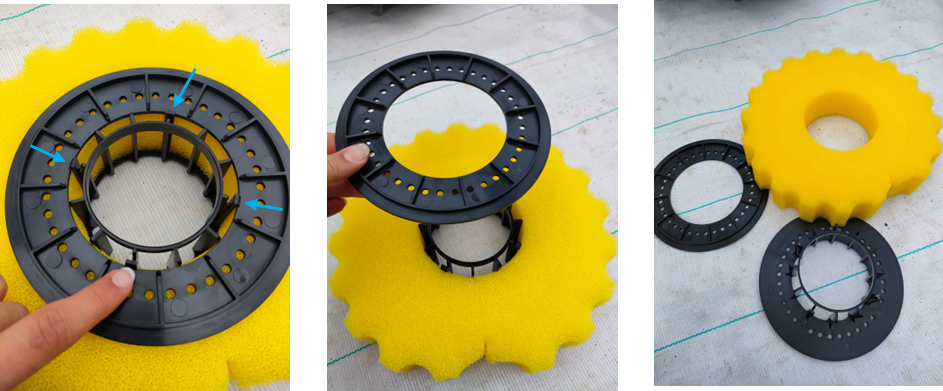
-
- Maintenance: clean the sponges with clean water. Adding any product is not necessary. Once clean, the sponges can be fitted back onto their plastic support directly, before reassembling the whole module.
- Replacement: replace worn sponges with new ones before reassembling the module.
Make sure to put the sponges back in order, starting with number 1. Its central support has a cylinder that protrudes more than the other 3, allowing an ideal fit with the lid. Each following sponge is then nested in the same direction, with the flattest side of the support at the top as shown in the photo below.
4. Cleaning the air pump / aerator
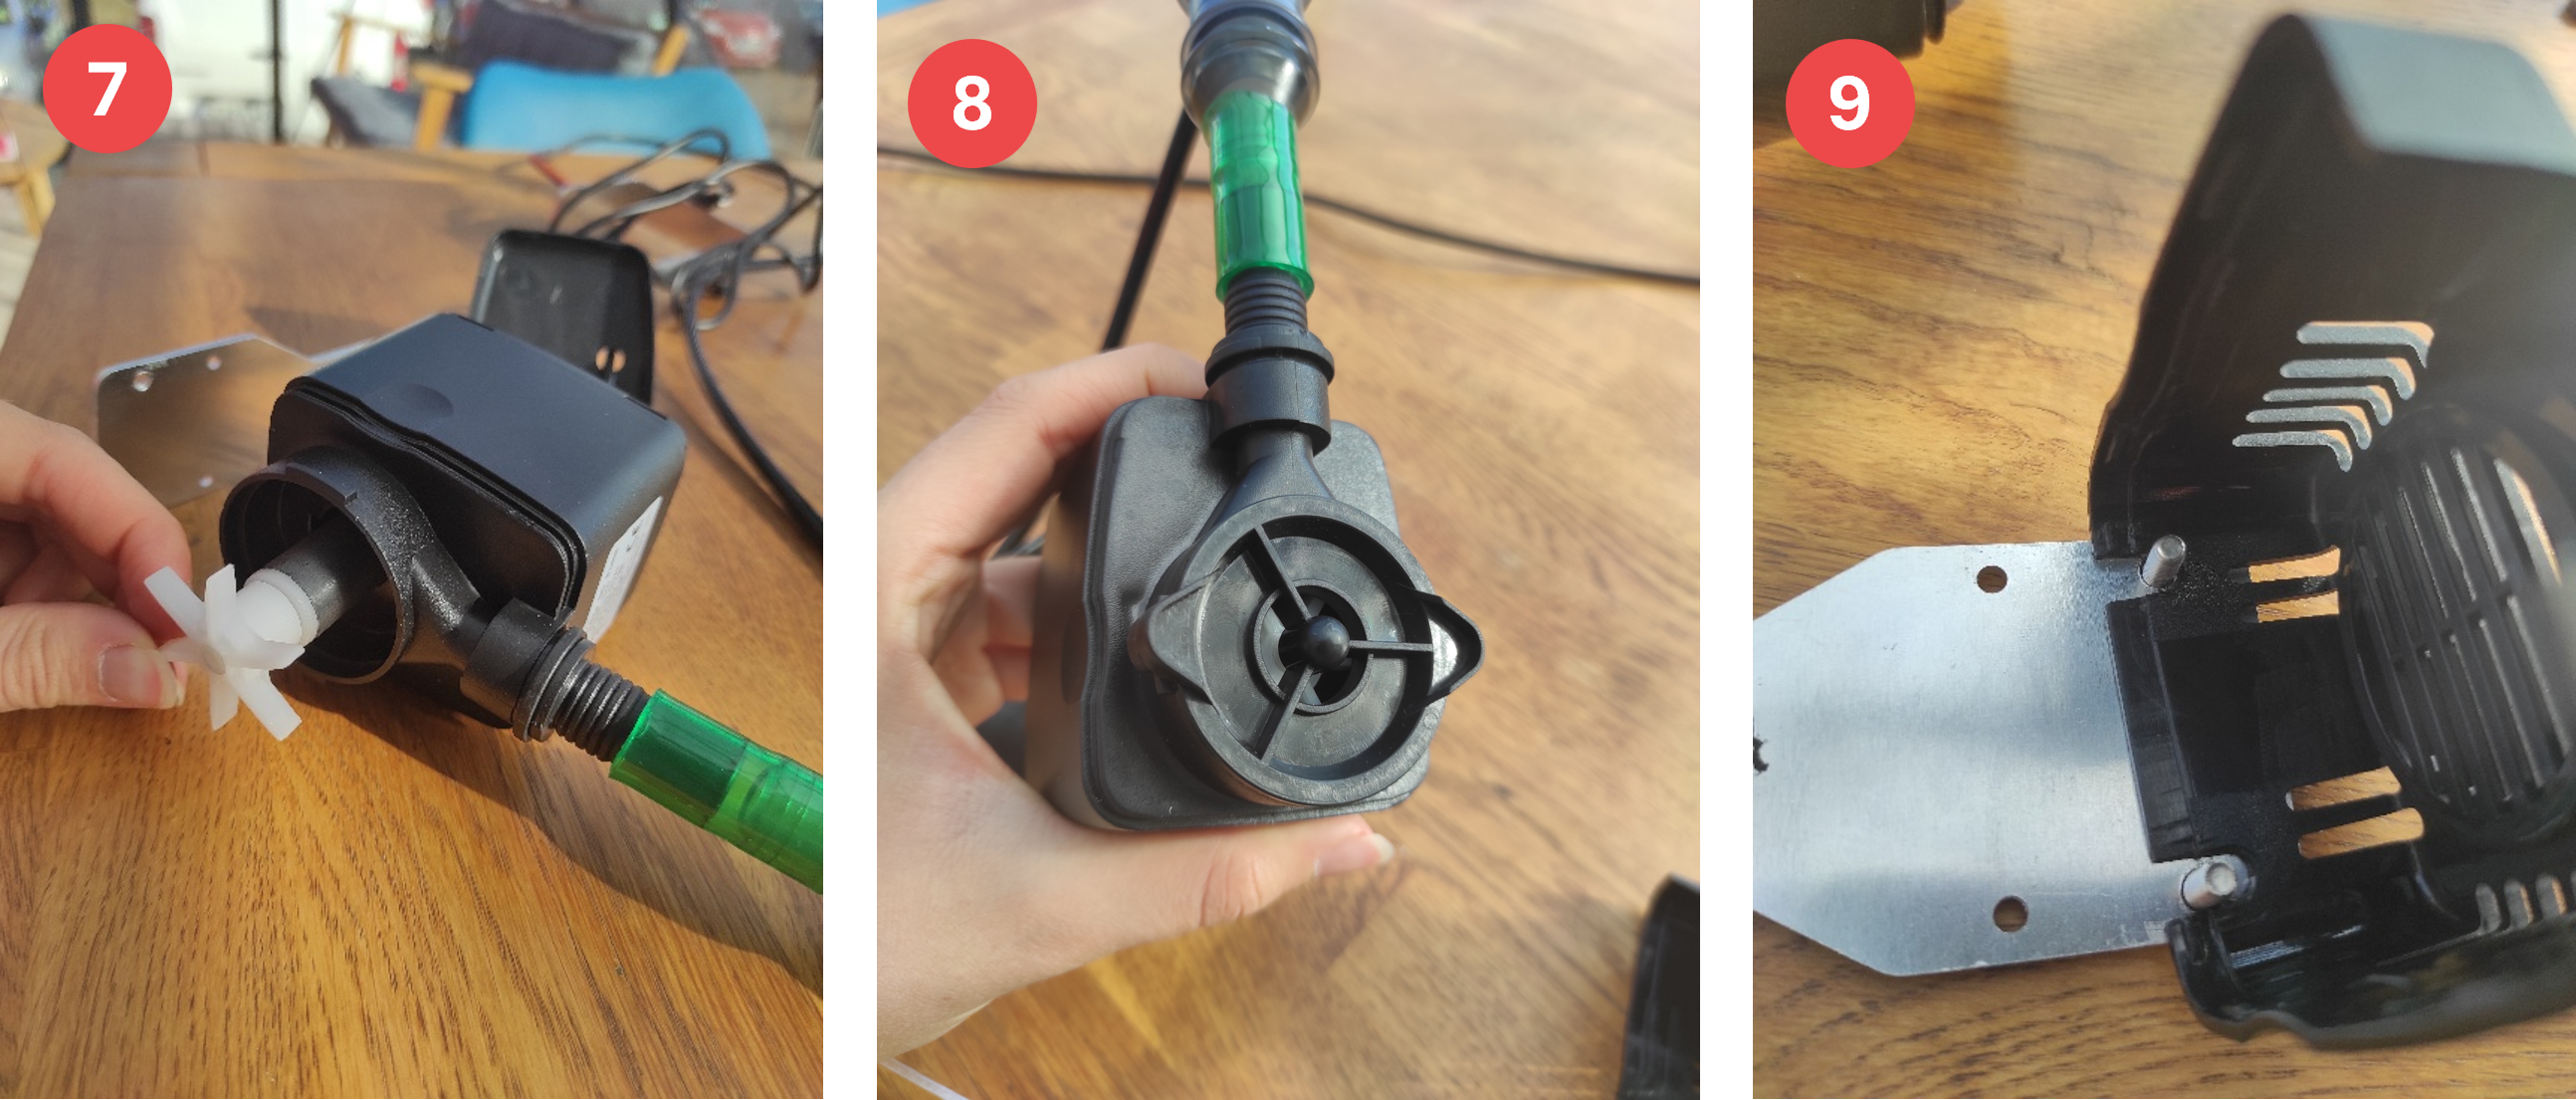
Air pump / aerator maintenance steps
To be done every 3 months
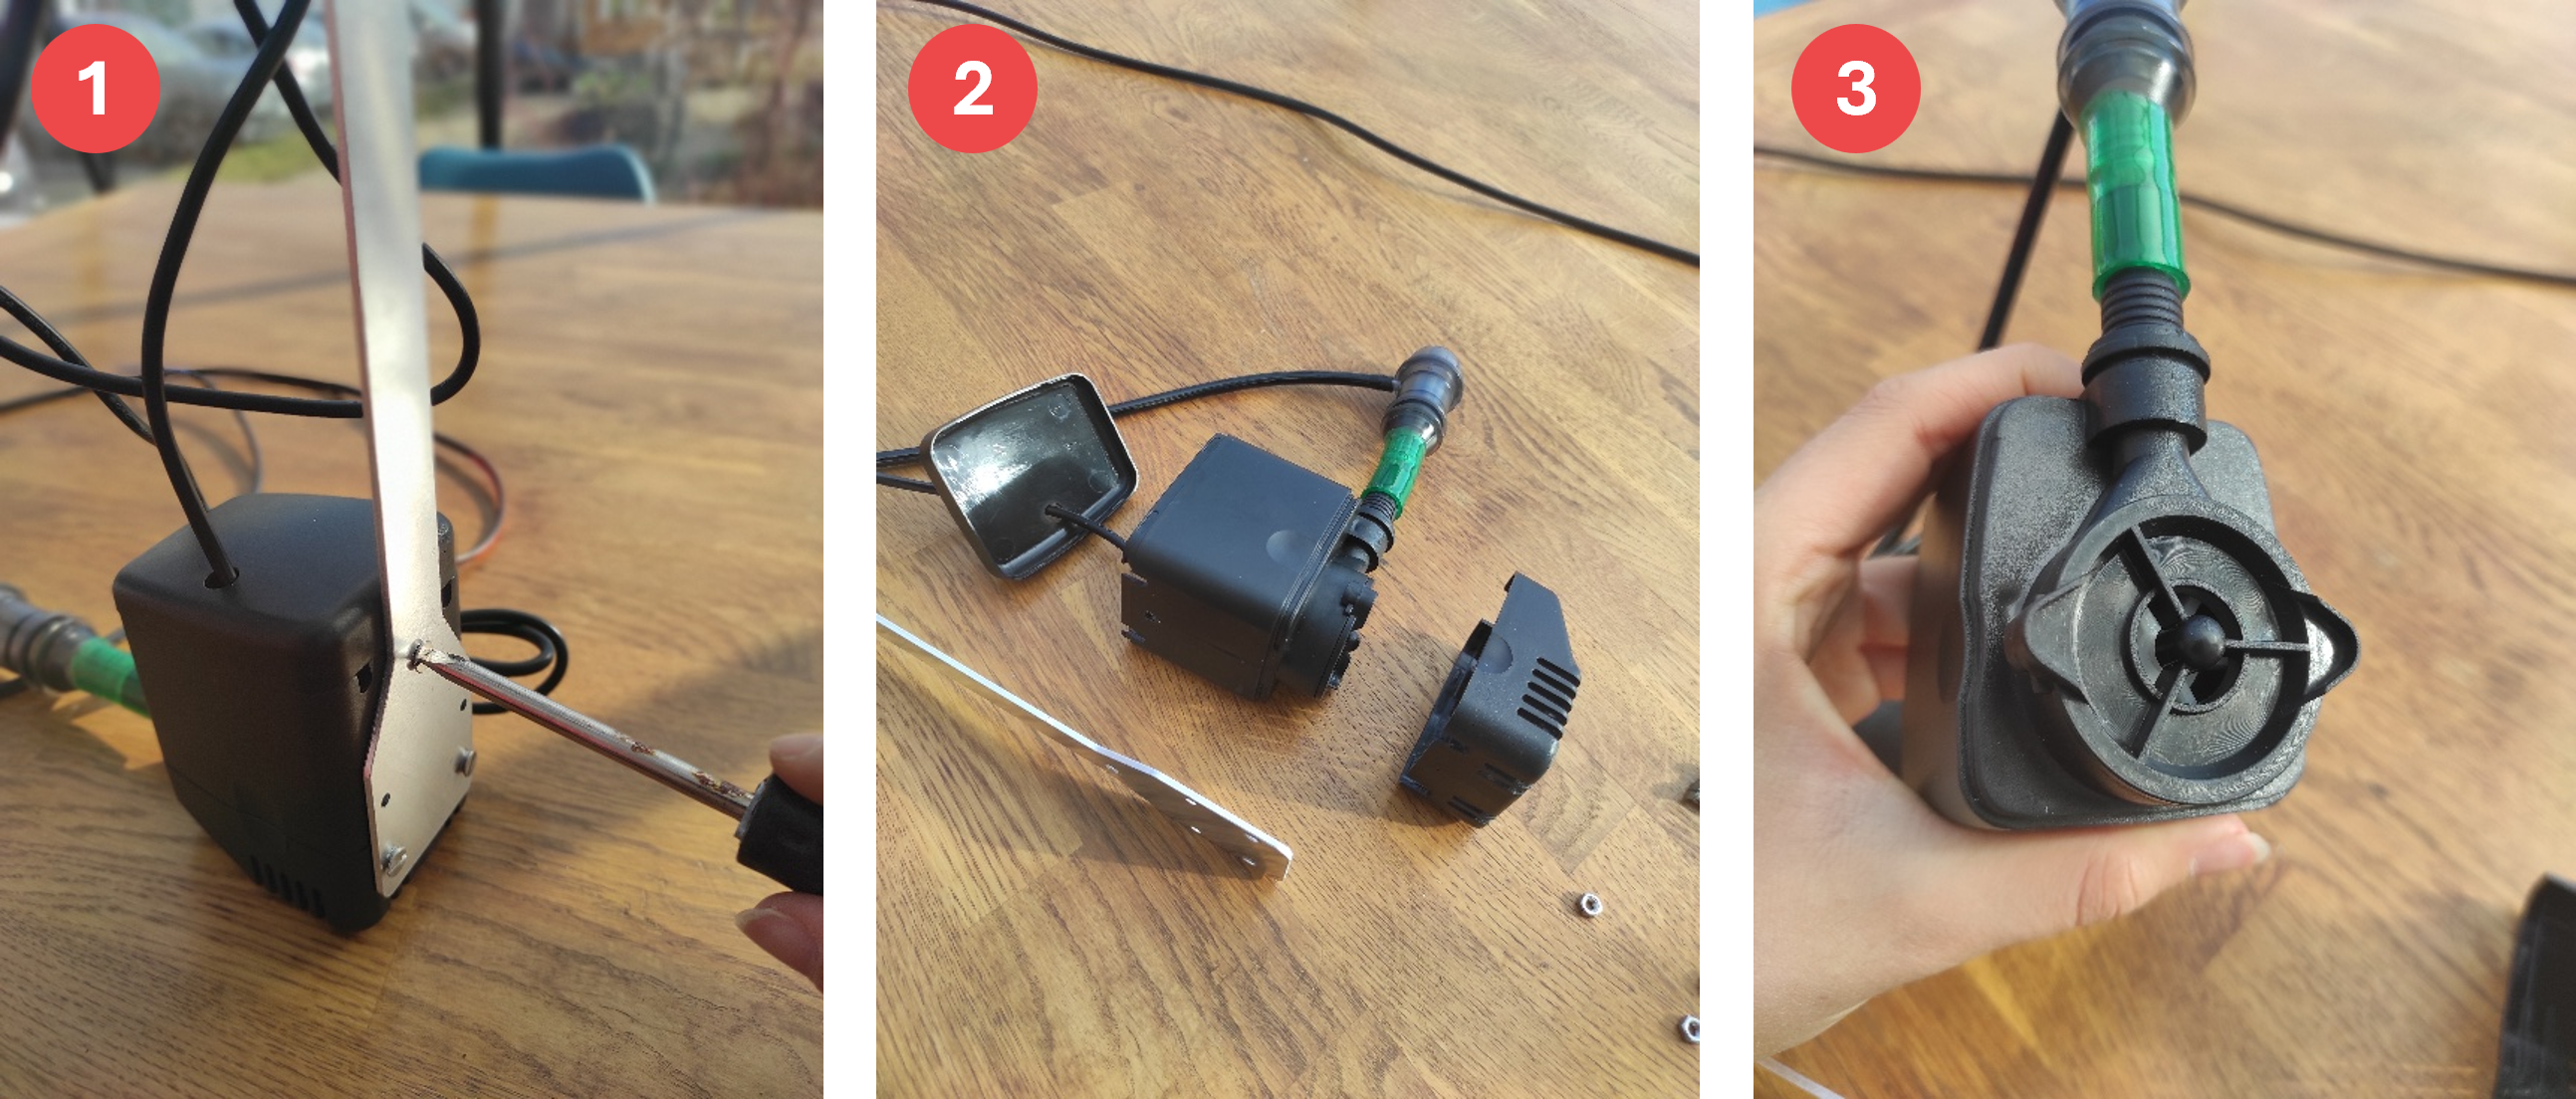
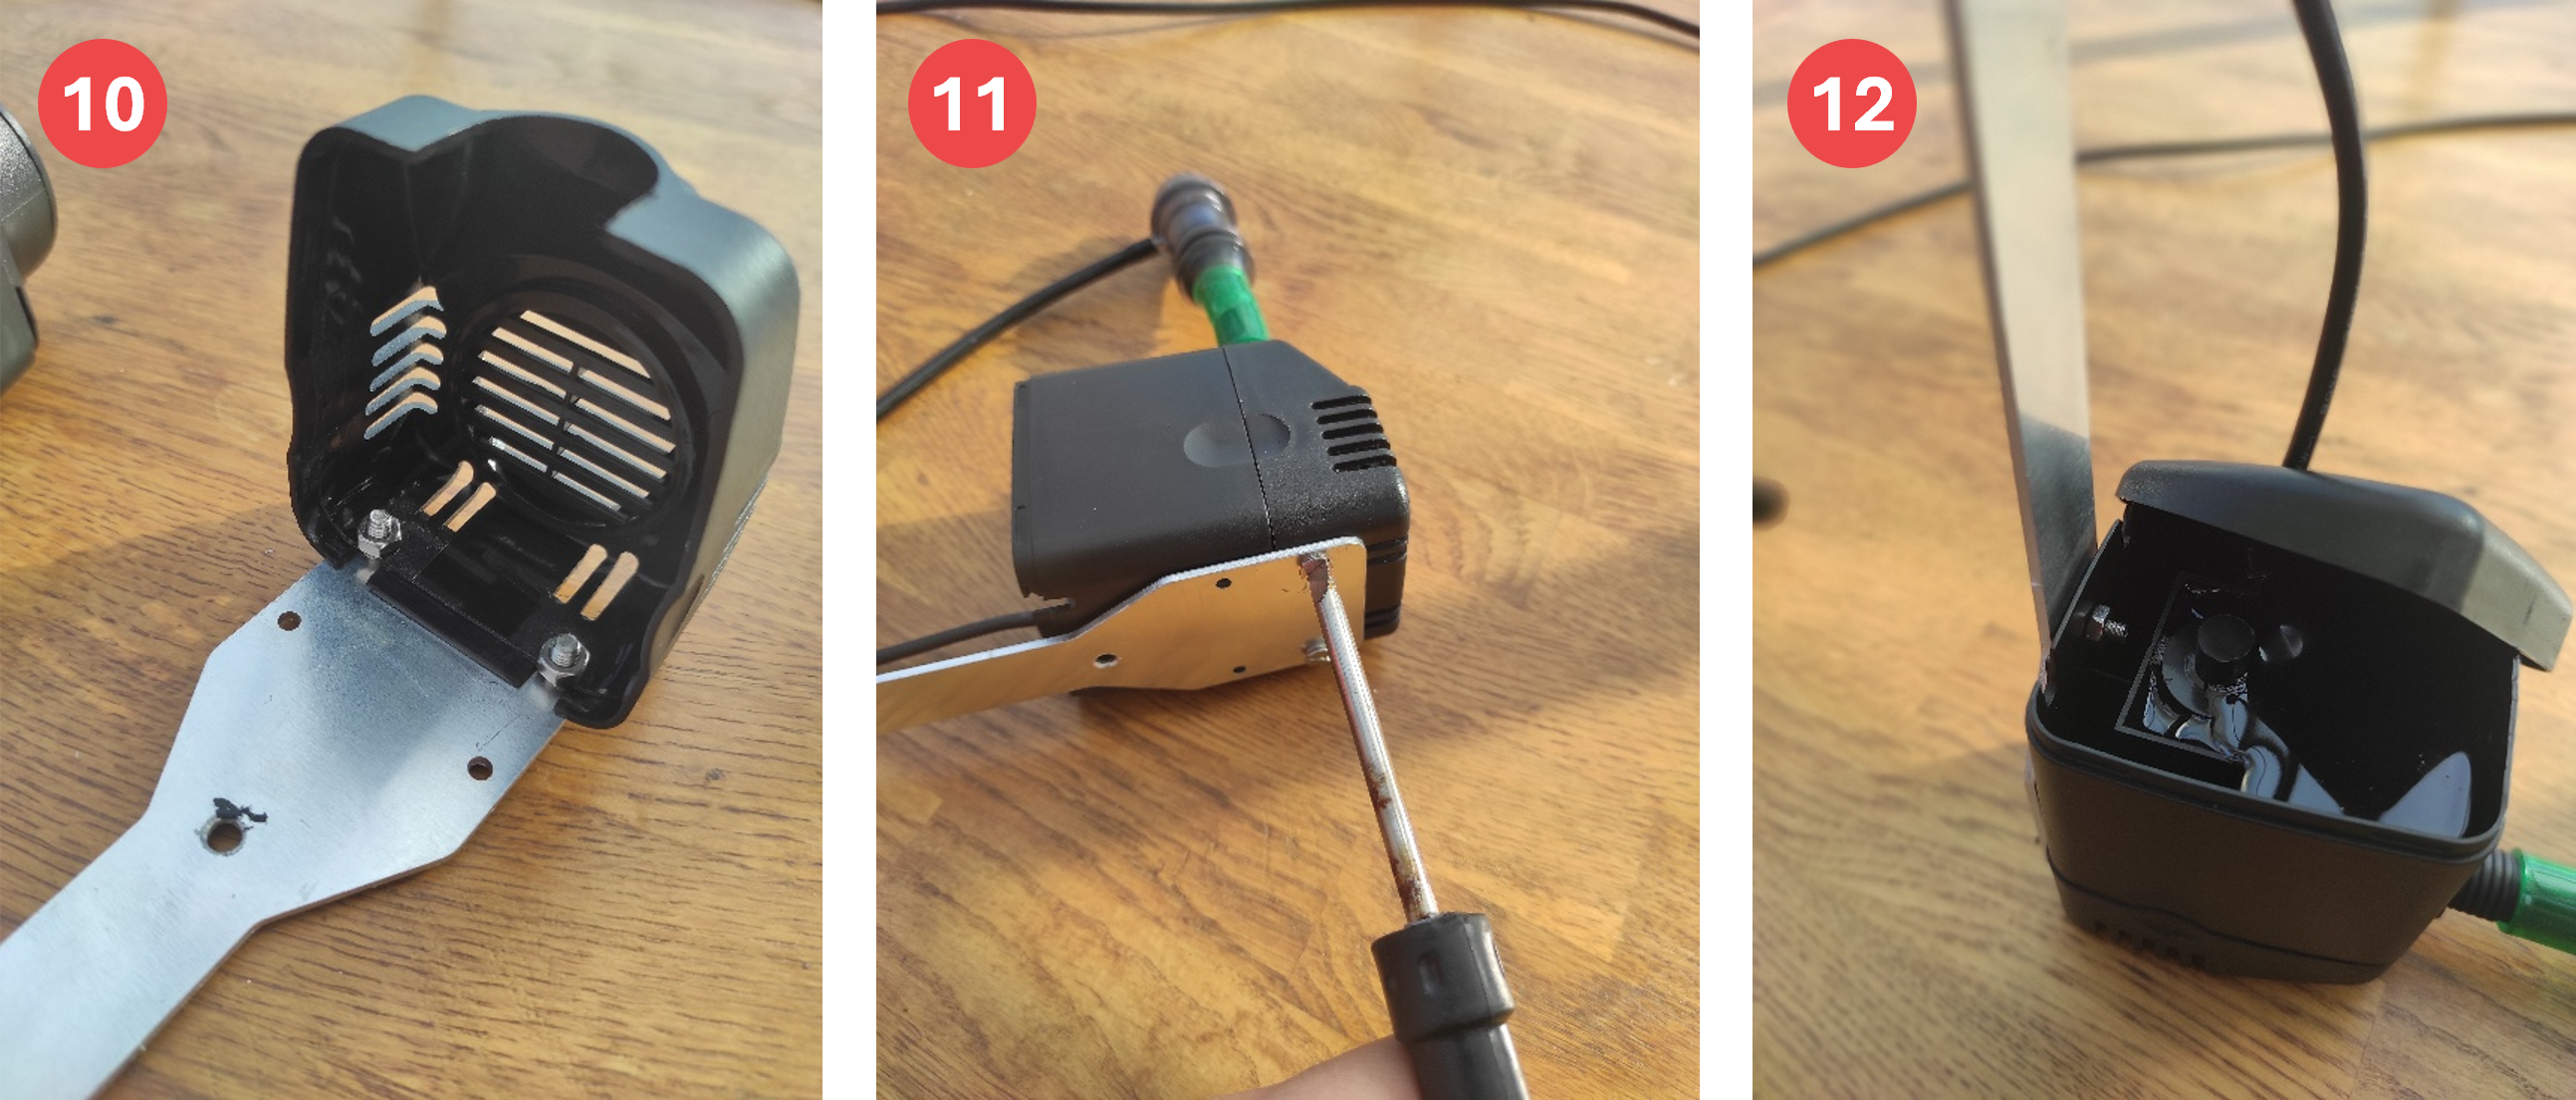
- Unscrew the 3 screws with a flat-head screwdriver.
- Unclip the two covers (top and bottom) and set them aside, along with the screws and the 3 nuts.
- Place the lower part of the air pump / aerator facing you so you can clean it.
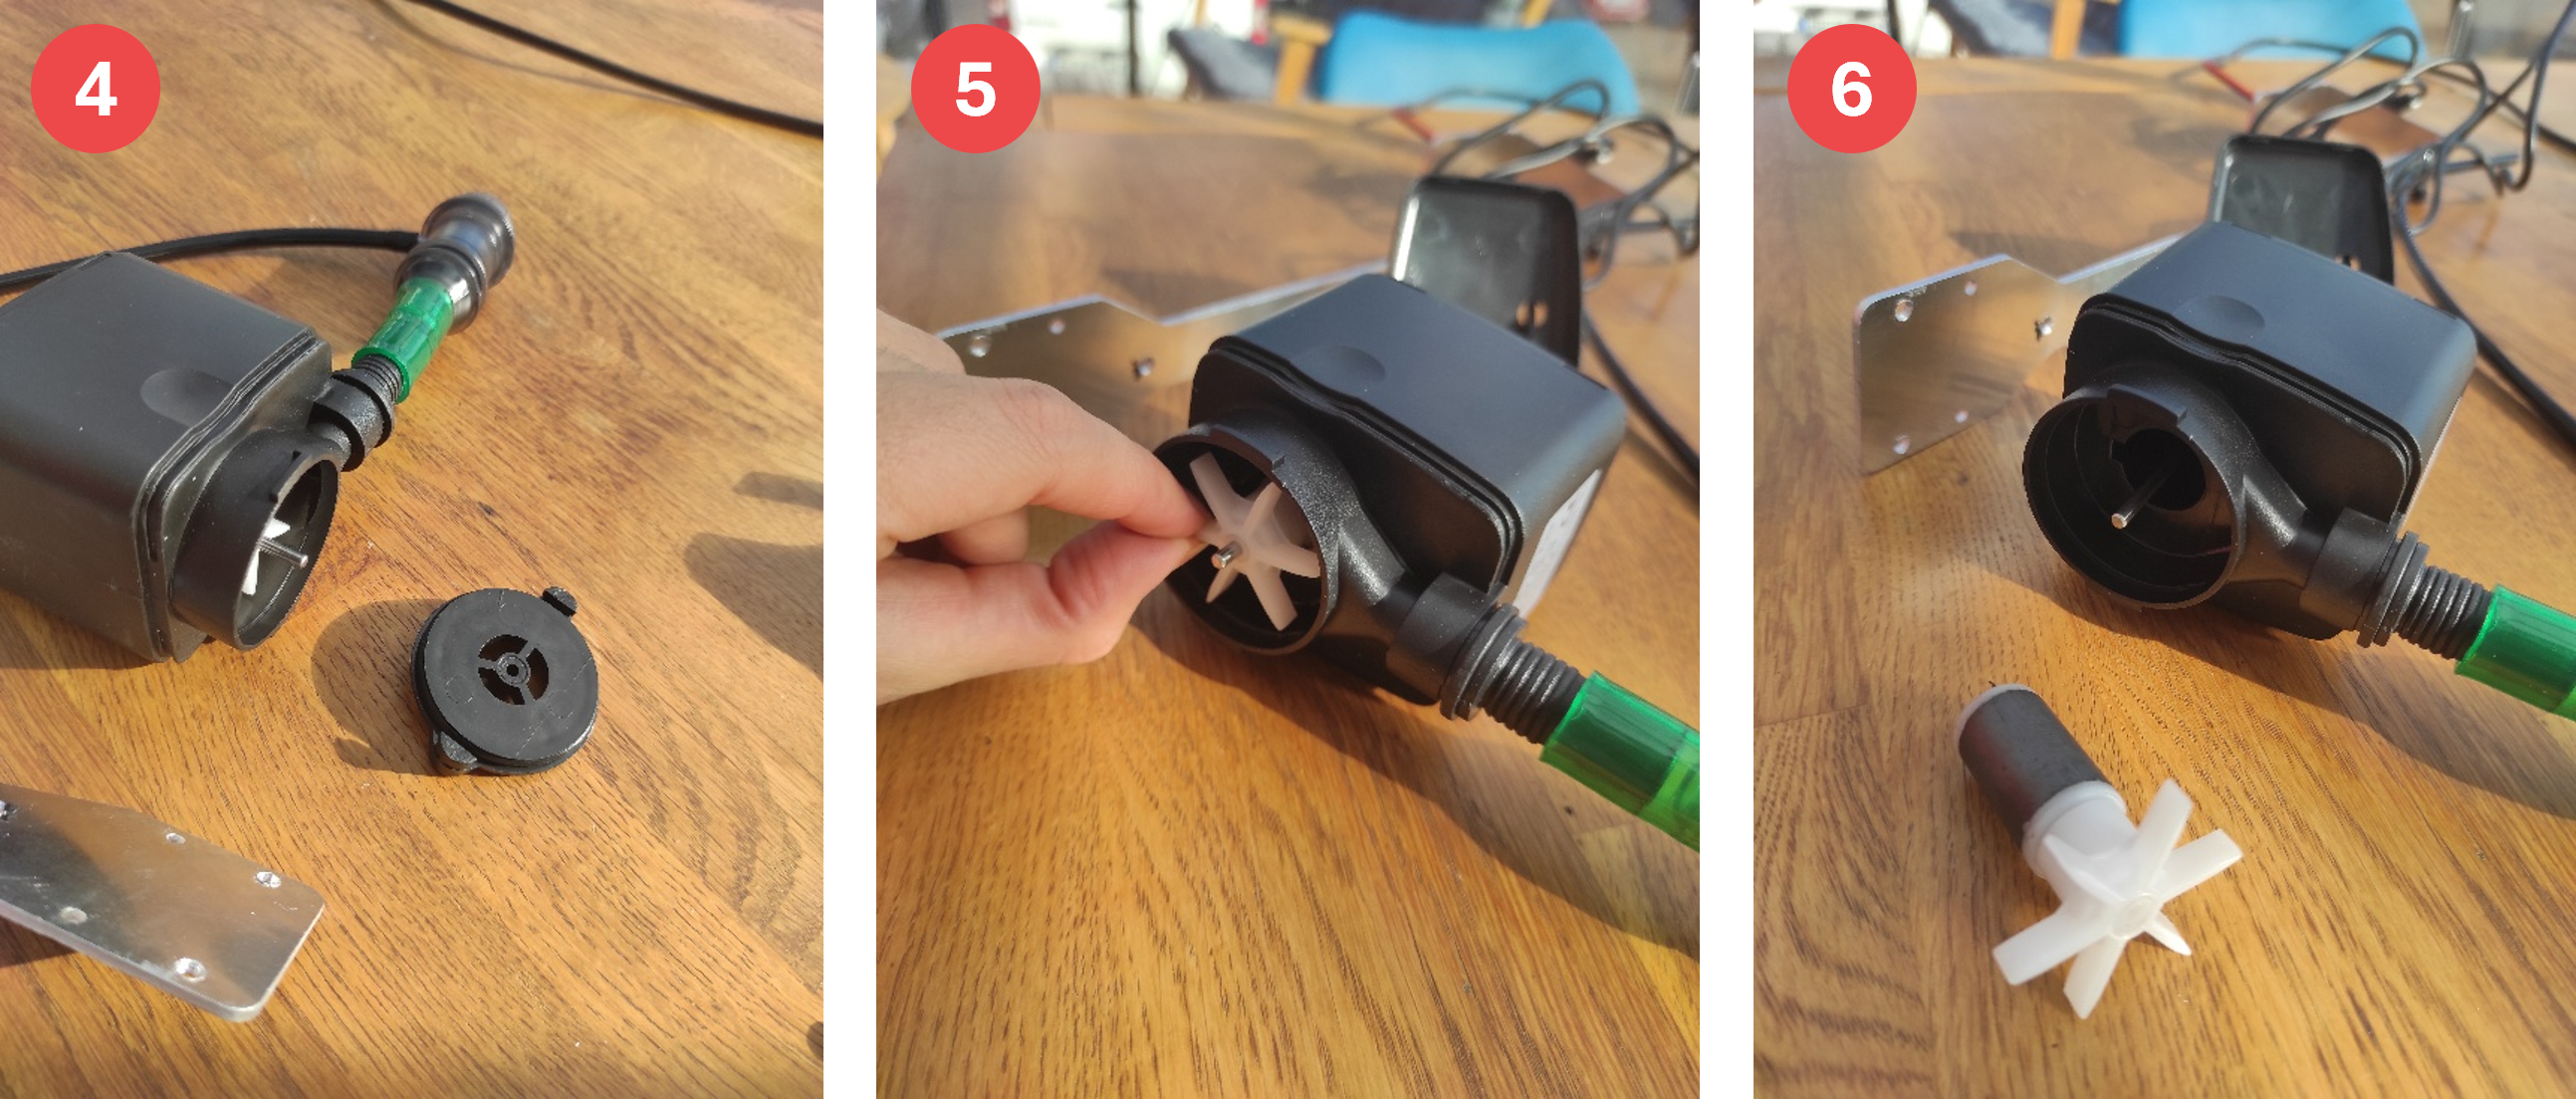
- Turn the cover plate over the pump inlet, then lift the cover to reveal the turbine.
- Take the turbine blade with your fingers. Lift it out of the housing; there is slight resistance from the magnet.
- Clean the turbine with water, as well as the plastic covers removed earlier.
- Slide the clean turbine back into the centre of the housing.
- Place the pump cover, making sure the seal is properly locked.
- Insert 2 screws into the metal support, then place the cover (lower part).
- Place and screw the nuts onto the screws.
- Clip the cover onto the air pump / aerator and screw in the screws.
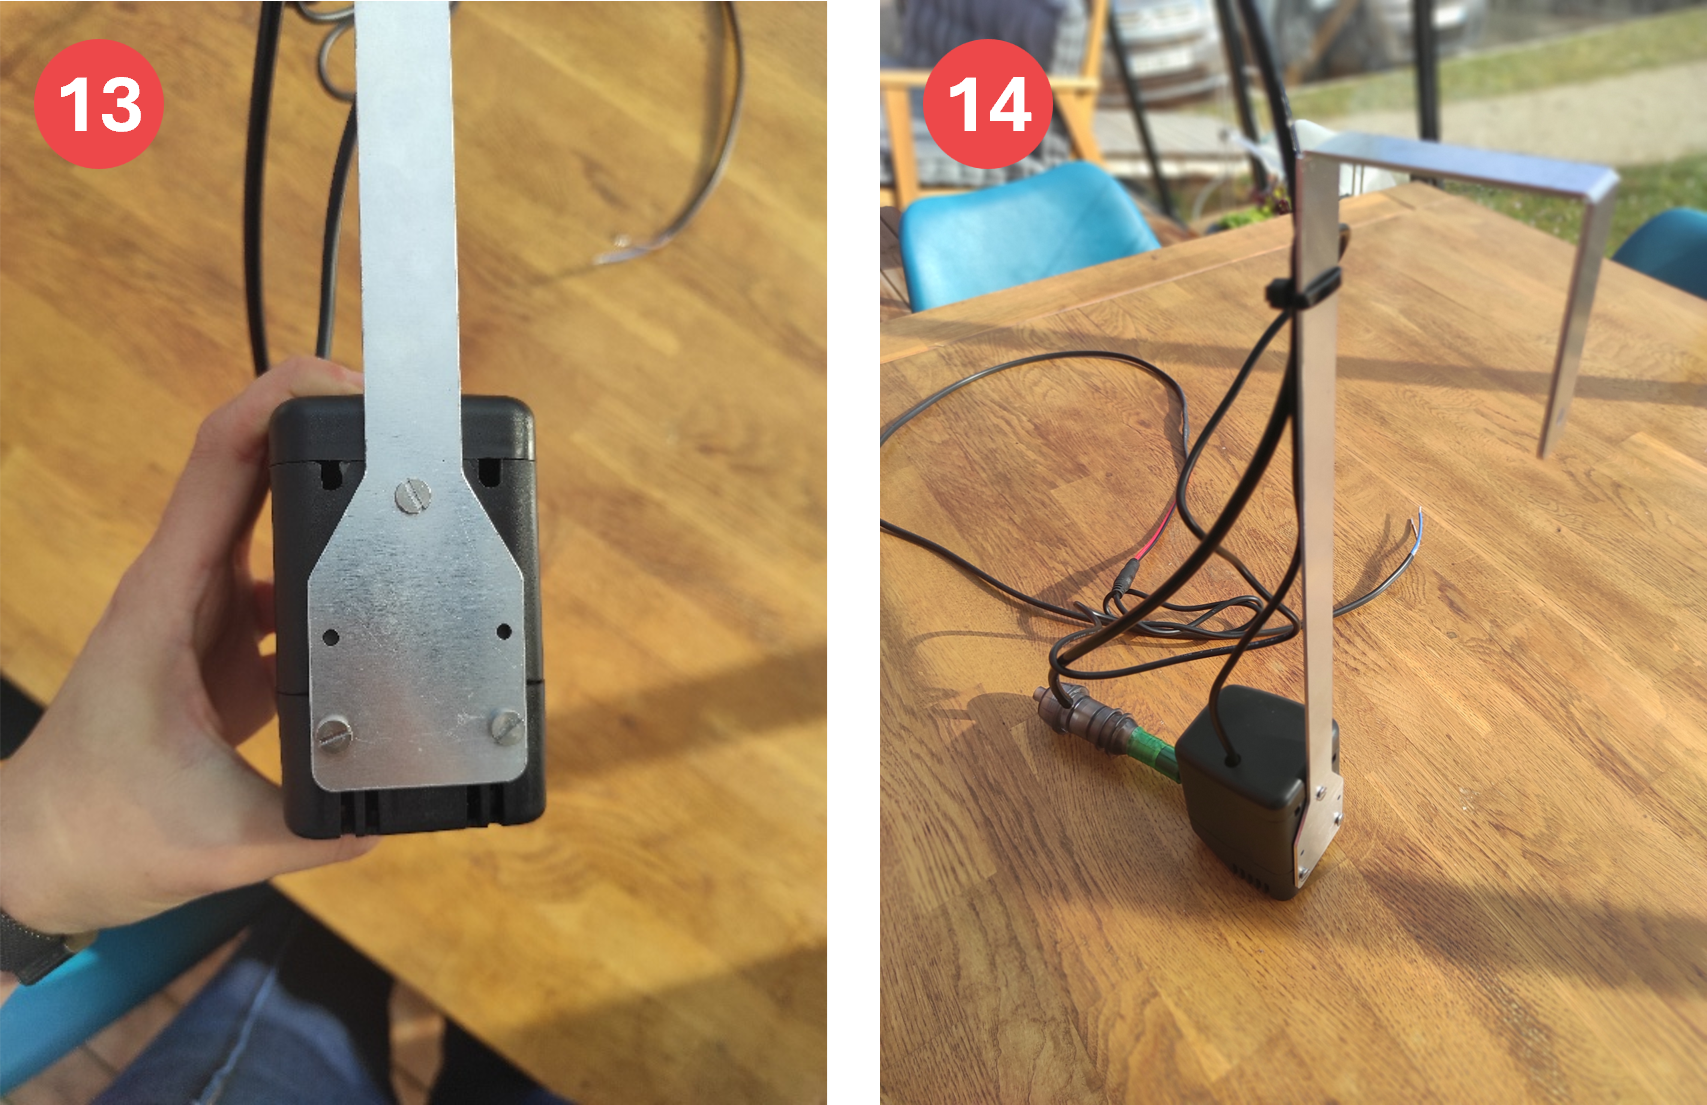
- For the upper part, insert the screw into the metal support and the air pump / aerator. Insert the nut and tighten it securely.
- The 3 screws must be correctly positioned.
- Close the filter and place it back in the tank. Make sure the hose is connected to the pump.
5. Cleaning the City greenhouse filter
6. Water and filter maintenance
To ensure the health of all the inhabitants of the tank, whether fish or humans, here are the measures to adopt:
- Regular Maintenance
Thorough Filter Cleaning: Clean the filters every 2 weeks with the handle and completely every 2-3 months. Remove all organic debris without delay.
Partial Water Renewal: When cleaning the filter, draining the water allows you to carry out a partial water change to maintain optimal quality and prevent the build-up of contaminants. After each cleaning, top up the water with appropriate water (alternating tap water and rainwater)
- Use of Ultraviolet (UV)
Installation of UV Systems: Set up effective UV filtration systems to significantly reduce the bacterial load and algae pressure.
- Temperature Control
Maintaining Optimal Temperatures: Regulate the water temperature according to the specific needs of the fish, avoiding temperatures beyond the ranges favourable to bacterial growth, above 30°-35°.
- Selection of Healthy Fish
Responsible Purchase: Source only fish from reliable and certified suppliers. Inspect their health condition carefully before introducing them into the tank.
- Your hygiene
Mandatory Use of Gloves: You must wear gloves when handling water or fish, especially if you have injuries on your hands.
Immediate Disinfection: Disinfect any cut or scratch immediately after handling the tank to prevent any risk of infection or contamination.
By applying these practices rigorously, you ensure a healthy and safe environment for the fish and also protect the health of people in contact with the tank.