
Grow with your Aerospring garden
A vertical garden for small spaces.
To better understand the concept of soilless growing and its application in our Aerospring vertical garden, you first need to understand how plants develop their roots and how important they are for the growth of your plants.
In nature, plants explore the soil with their roots and feed on the nutrients available nearby. Over time, they deplete the soil’s resources, forcing the plants to form new root tips to explore a wider area richer in nutrients. The root network can therefore reach a very large volume.
In the Aerospring vertical garden, the roots have all the nutrients available to them: the plants’ needs are met by continuous irrigation rich in organic fertilizer. Although the root volume is more limited than in open ground, it guarantees optimal growth for your vegetables. They benefit from the best conditions for developing dense, healthy and vigorous roots, allowing the above-ground parts (stem, leaf, flower, fruit) to thrive.
1. Getting started right
NoteYou can find all the assembly explanations in our video tutorial.
Positioning and exposure
- More information about placing your Aerospring vertical garden here.
Level in the reservoir
- The reservoir must be filled to 10 cm below the base of the aerospring.
- Use rainwater preferably, otherwise tap water.
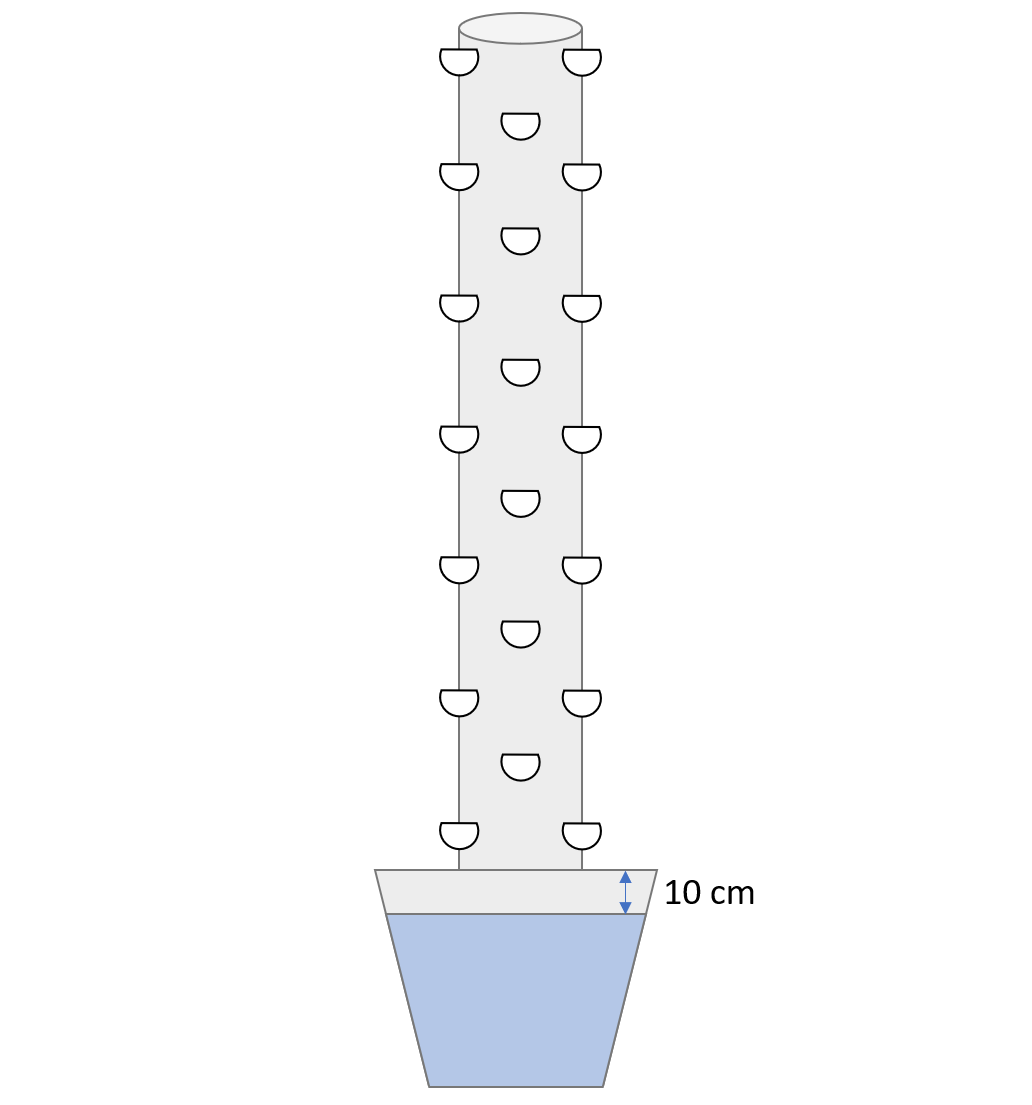
Fill level of the Aerospring base
Grow in your vertical garden
- Place one plant in each of the 36 growing cups. Position the root ball containing the plant at the bottom of the growing cup and secure it with around ten clay pebbles.
- Afterwards, do not remove the root ball before harvest so as not to damage the roots.
Arrangement of the different plant species by type
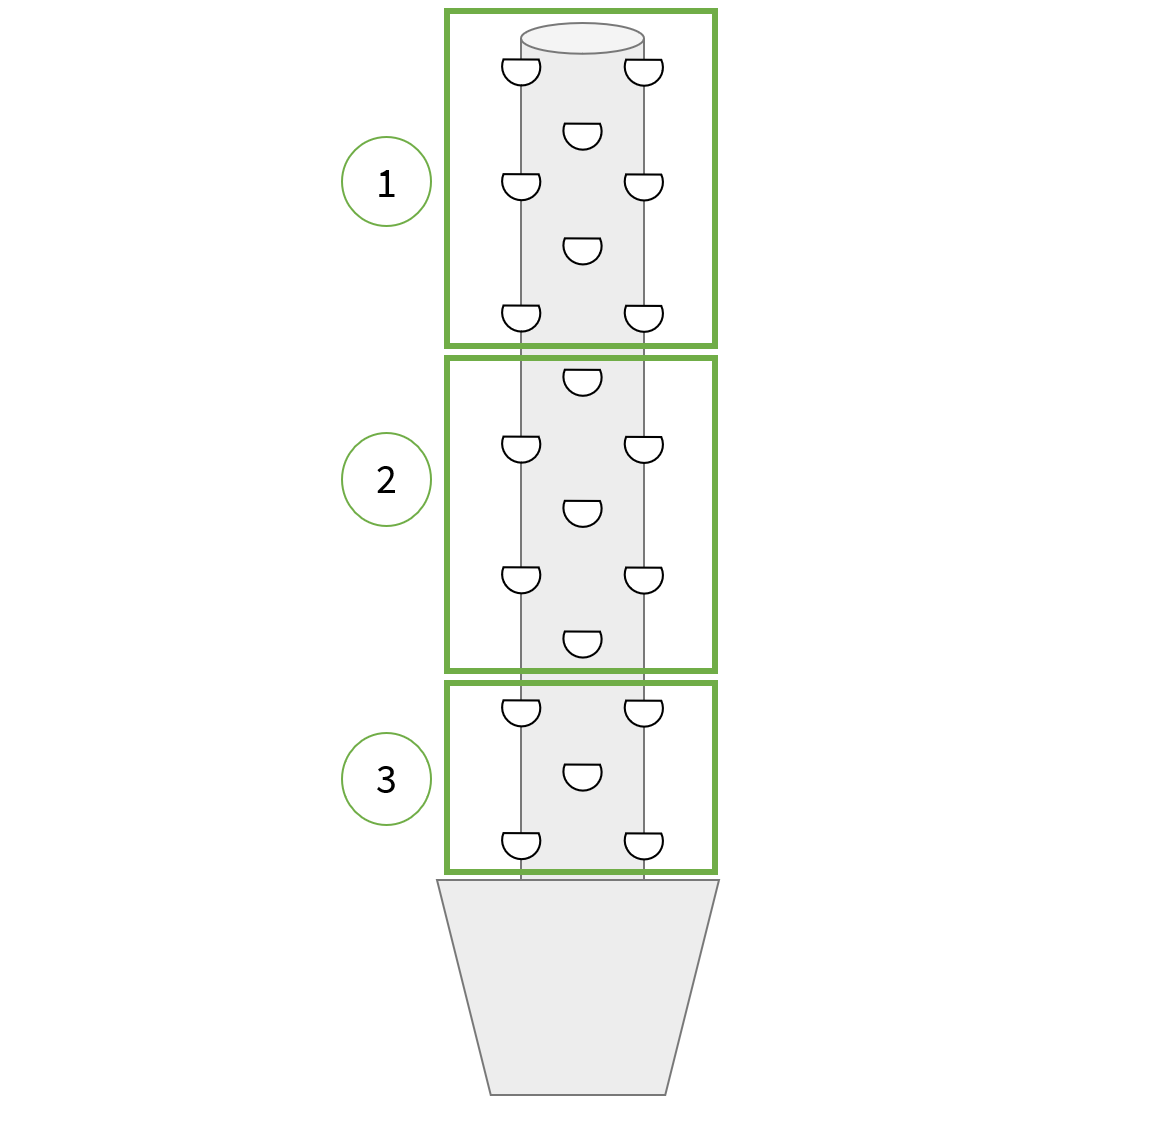
Pyramidal diagram of plant distribution in the Aerospring
1 - Upright, erect plants - aubergine, chilli pepper, bell pepper, determinate tomato.
2 - Plants with a compact, non-invasive habit - lettuces, celery, cabbage, herbs.
3 - Trailing plants, indeterminate growth - courgettes, cucumbers, nasturtium, indeterminate tomato. This position allows the surface of the reservoir to be used as support for the plants and their fruits.
Changing crops
- Once the plant has been harvested or the growing season is over, remove the plant and its growing cup by pulling the roots out of the matrix (black substrate).
- Compost the plant and the substrate.
- Clean the growing cups with clean water and soap.
2. Fertilizer & crop auxiliaries
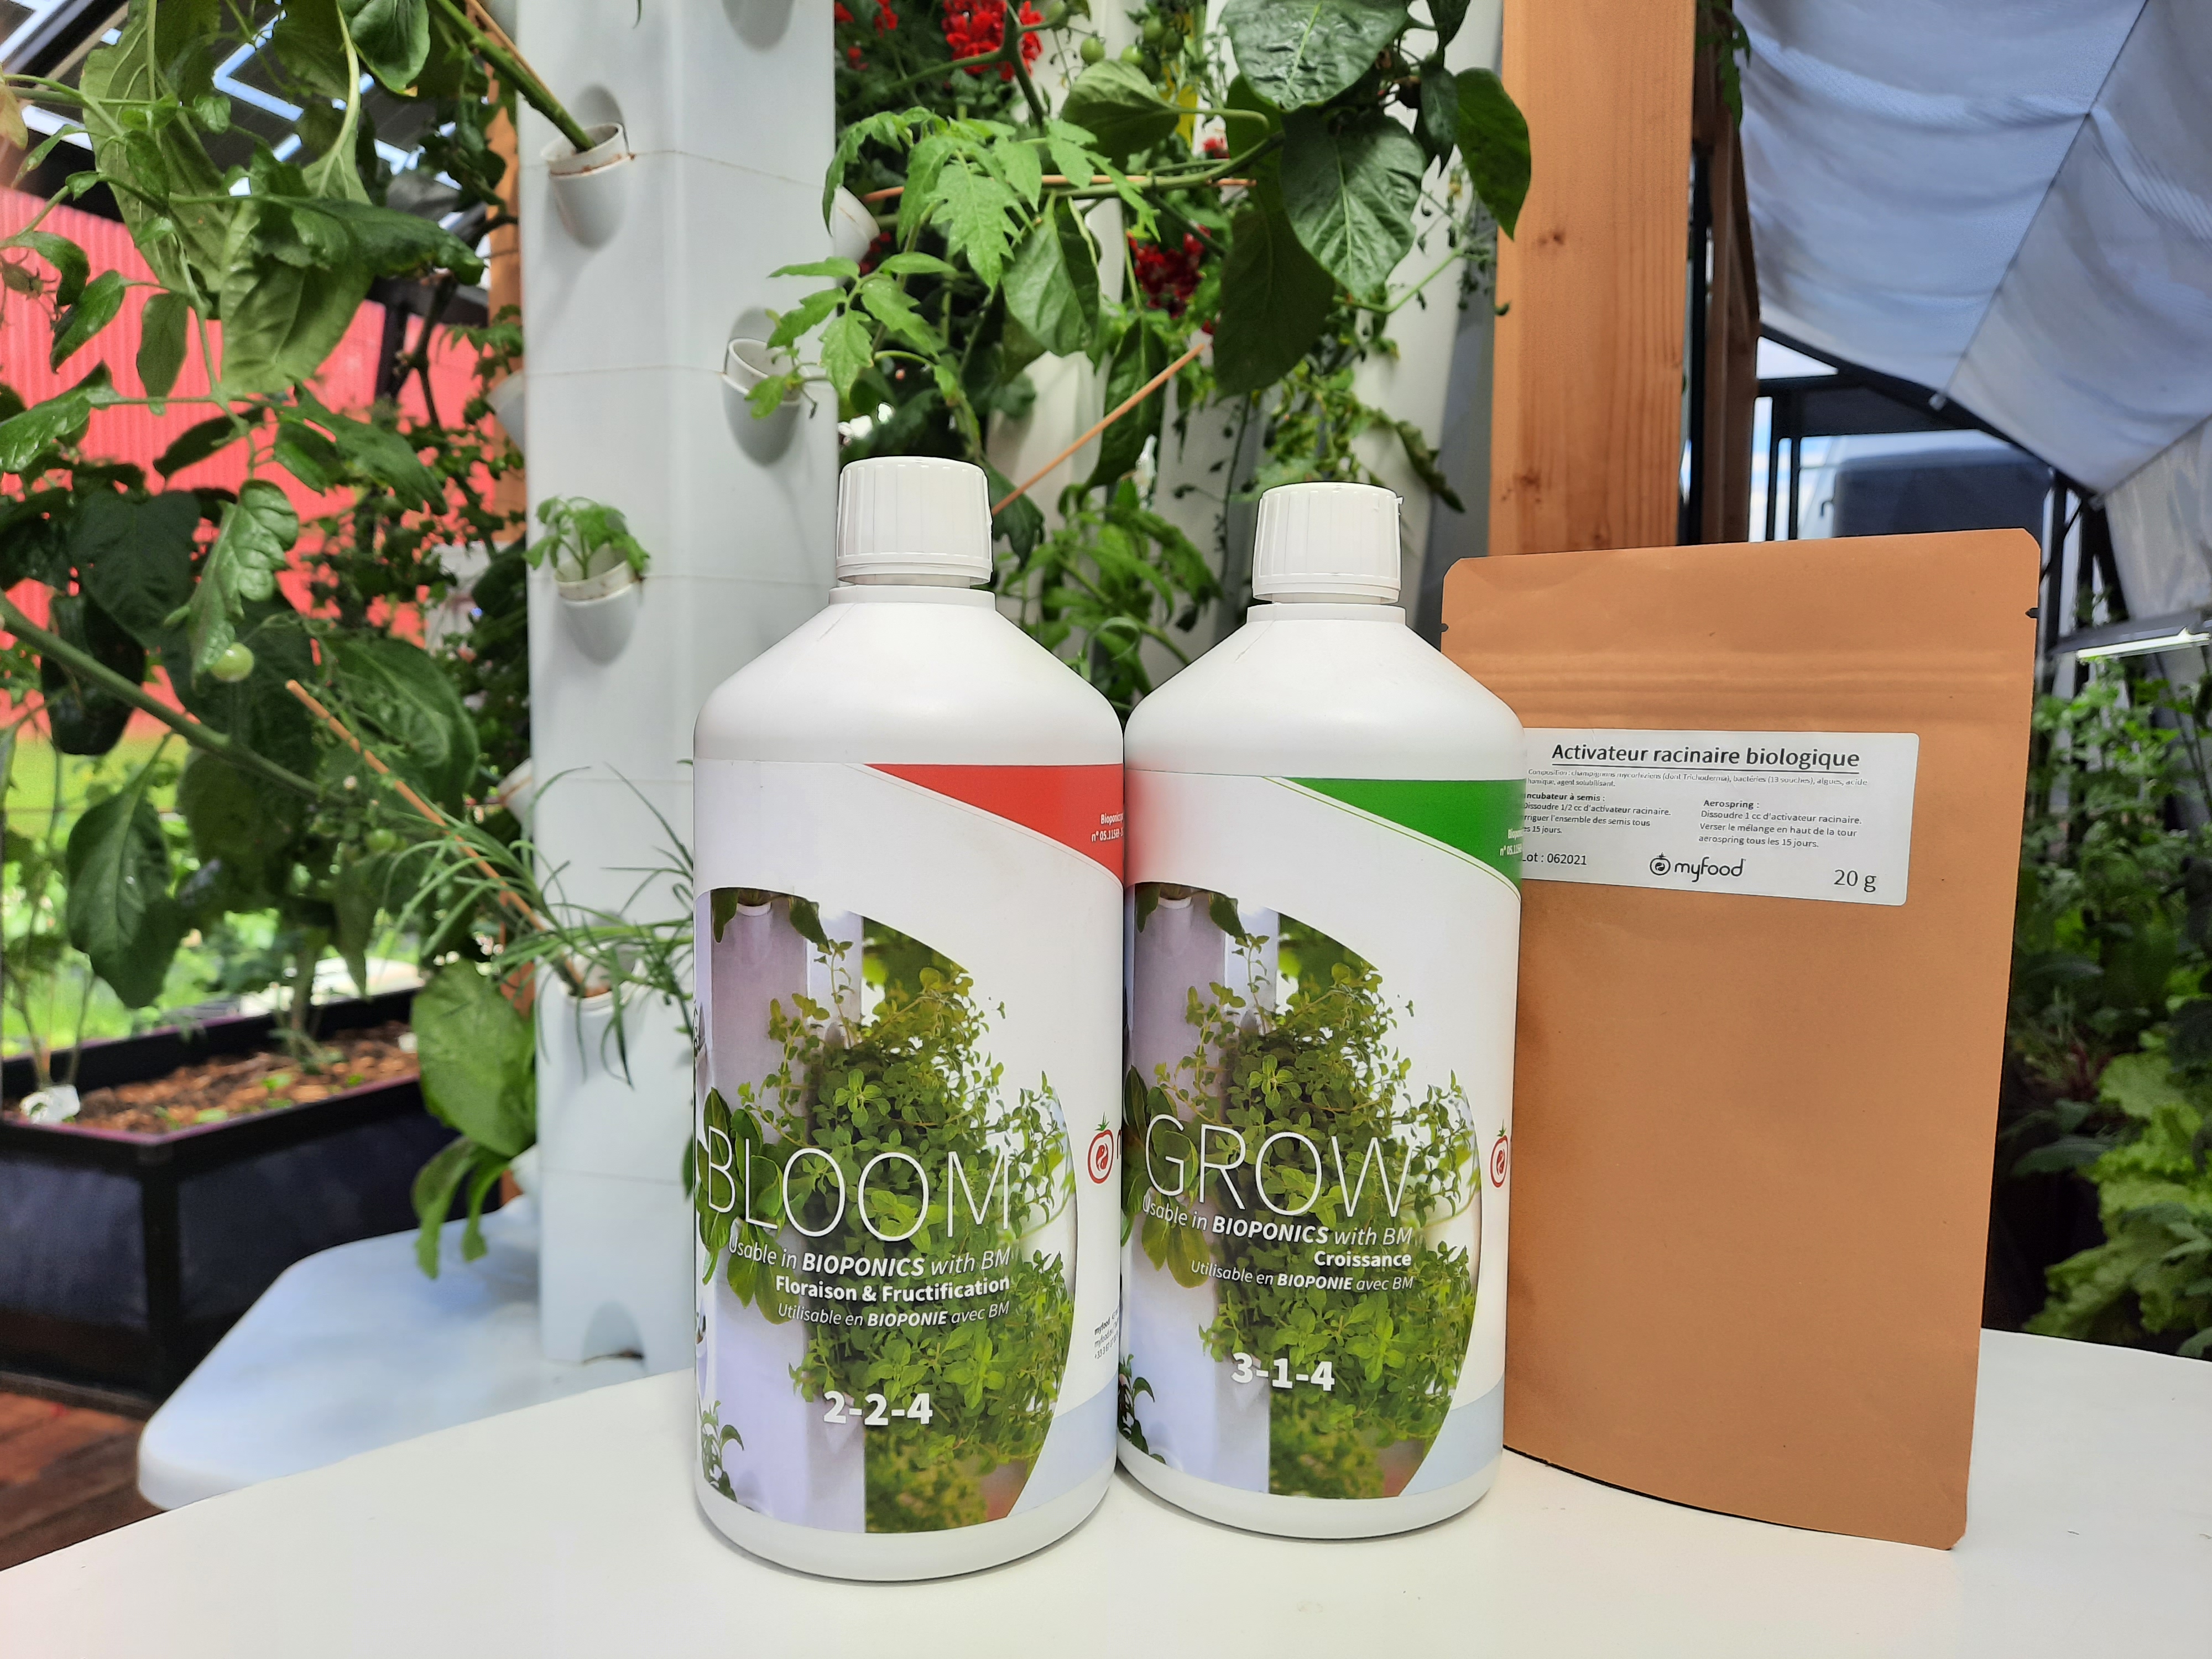
Our fertilizers and auxiliaries
Description
GROW and BLOOM fertilizers
- Grow is used for the plant’s overall growth and root development.
- Bloom accelerates flowering and fruiting.
Bioponic Mix auxiliaries OR root activator
1- Bioponic Mix
- This sachet contains Trichoderma harzianum.
- Strengthens the plants’ root network to improve nutrient absorption.
2- Root activator
- This blend contains beneficial bacteria (Azospirillum sp) and mycorrhizal fungi (glomus intraradices).
- Increases the root absorption surface, improves plant nutrition and promotes plant recovery after transplanting.
MICRO-ORGANISMSWith your Aerospring, you will receive one sachet of Bioponic Mix OR one sachet of root activator, but not both.
Do you have a sachet of Bioponic Mix?
- You need to add it in two steps according to the recommendations below.
Do you have a bottle of root activator?
- Add 1 tablet to 1L of water after each sowing, then water the root balls gently from above
- Add 2 tablets/fish tank (CITY) and 3 tablets/fish tank (FAMILY), dilute in 200 mL of water, then pour directly into the black tube, in spring and then every 3 months.
- The tablet format gives you several months of autonomy depending on
your model.
Method for adding organic fertilizers and auxiliaries
- Add liquid fertilizers directly to the water reservoir.
- Dissolve the amount of root activator in the measuring cup with water, then pour the mixture in from the top of the Aerospring. Do not dilute directly in the reservoir.
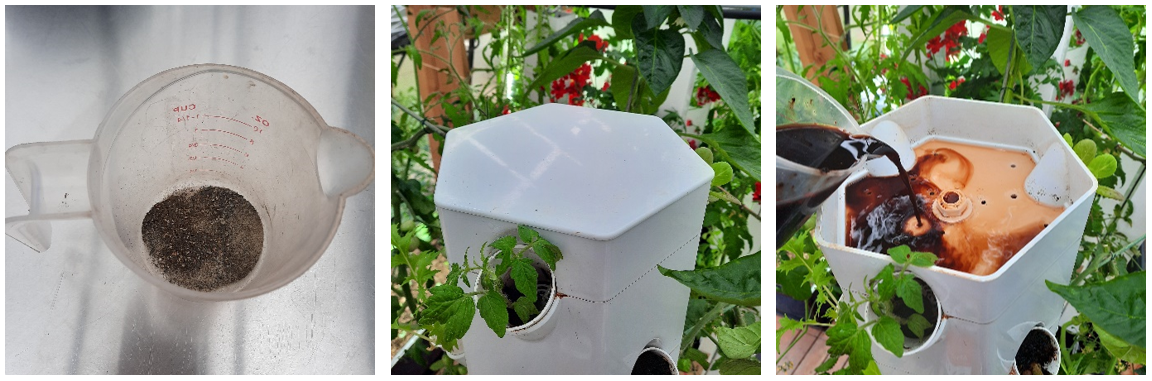
Adding root activator to the vertical garden
Quantities and frequency of additions
Addition of Bioponic Mix micro-organisms
| As soon as the system is filled with water | Half the sachet (5 grammes) |
| 2 to 3 weeks after the first addition | Half the sachet (5 grammes) |
Leafy vegetable dominance (lettuces, spinach, cabbages, herbs, etc.):
| Period | Frequency | Fertilizer addition | Fertilizer addition | Fertilizer addition |
|---|---|---|---|---|
| LEAFY VEGETABLE DOMINANCE | GROW | CALCIUM | ROOT ACTIVATOR | |
| Start-up | 70 à 100mL | 30ml | 1 cc (approx. 4g) | |
| Spring, summer, autumn (rapid growth) | Every 2 weeks | 70 à 100mL | 30ml | 1 cc (approx. 4g) |
| Winter (slow growth) | Once a month | 40 à 50mL | 30ml | 1 cc (approx. 4g) |
Fruiting vegetable dominance (tomatoes, aubergines, peppers, courgettes, cucumbers, etc.):
| Period | Frequency | Fertilizer addition | Fertilizer addition | Fertilizer addition | Fertilizer addition |
|---|---|---|---|---|---|
| FRUITING VEGETABLE DOMINANCE | GROW | BLOOM | CALCIUM | ROOT ACTIVATOR | |
| Start-up | 35 à 50mL | 35 à 50mL | 30ml | 1 cc (approx. 4g) | |
| Spring, summer, autumn (rapid growth) | Every 2 weeks | 50 à 60mL | 50 à 60mL | 30ml | 1 cc (approx. 4g) |
3. Managing pH
In bioponics, plants have the best conditions for root absorption with an acidic pH, meaning around 6.
To test your pH, use the pH test kit. Fill the tube halfway with the water present in the reservoir and add two drops of the test solution.
If you do not get the ideal pH (=6), that is not a problem. You can still place your plants in the Aerospring cups. You can lower/increase the pH afterwards.
To lower the pH:
- Use rainwater to fill the reservoir.
- Add 30 ml of pH-down when filling with water and then every 2 weeks if needed.
To increase the pH:
- Add tap water to the reservoir
For proper operation of the vertical gardenMonitor the pH so you can regulate it as accurately as possible.
4. Adjust irrigation with the timer
Find all instructions for using the timer here.
Spring, summer, autumn
| Time slot | 9h à 11h | 11h à 19h | 19h à 21h | 21h à 9h |
|---|---|---|---|---|
| Watering | 15 minutes of watering every 30 minutes | 15 minutes of watering every 15 minutes | 15 minutes of watering every 30 minutes | No watering |
| Programmer settings | One tab down, two tabs up | One tab down, one tab up | One tab down, two tabs up | All tabs up |
In the event of a heatwave
Set the pump to continuous operation, all tabs down, for optimal plant growth.
The visual appearance of your plants gives you a good indication of their hydration level.
Winter
| Time slot | 9h à 17h | 17h à 9h |
|---|---|---|
| Watering | 15 minutes of watering every 2h | No watering |
| Programmer settings | One tab down, seven tabs up | All tabs up |
Indoor versionIndoors, heating increases plant transpiration. The number of watering cycles can be increased depending on the plants’ needs and their stage of development.
5. Maintenance schedule
Daily
- Check irrigation
- Check the health of your plants: vigour, colour, absence of deficiency
Weekly
- Prune the plants and remove dried parts
- Stake the plants if needed
- Check water level
- Plant, harvest and monitor your sowing
- Adjust the watering program according to climatic conditions
Every 2 weeks
- Add fertilizers and auxiliaries from spring to autumn
Monthly
- Add fertilizers and auxiliaries in winter
- Check the pH (=6) and adjust it
- Clean the surface of the Aerospring
- Renew the water about every 3 months if necessary (if there is deposit at the bottom)
- Post your results on the Community
Yearly
- Fully clean the tower structure with water
- Remove excess roots from the black matrix and rinse them with a jet of water
More information about maintenance of the pump and structure here.
6. What can you grow in your Aerospring?
Many crops can be grown in your vertical garden.
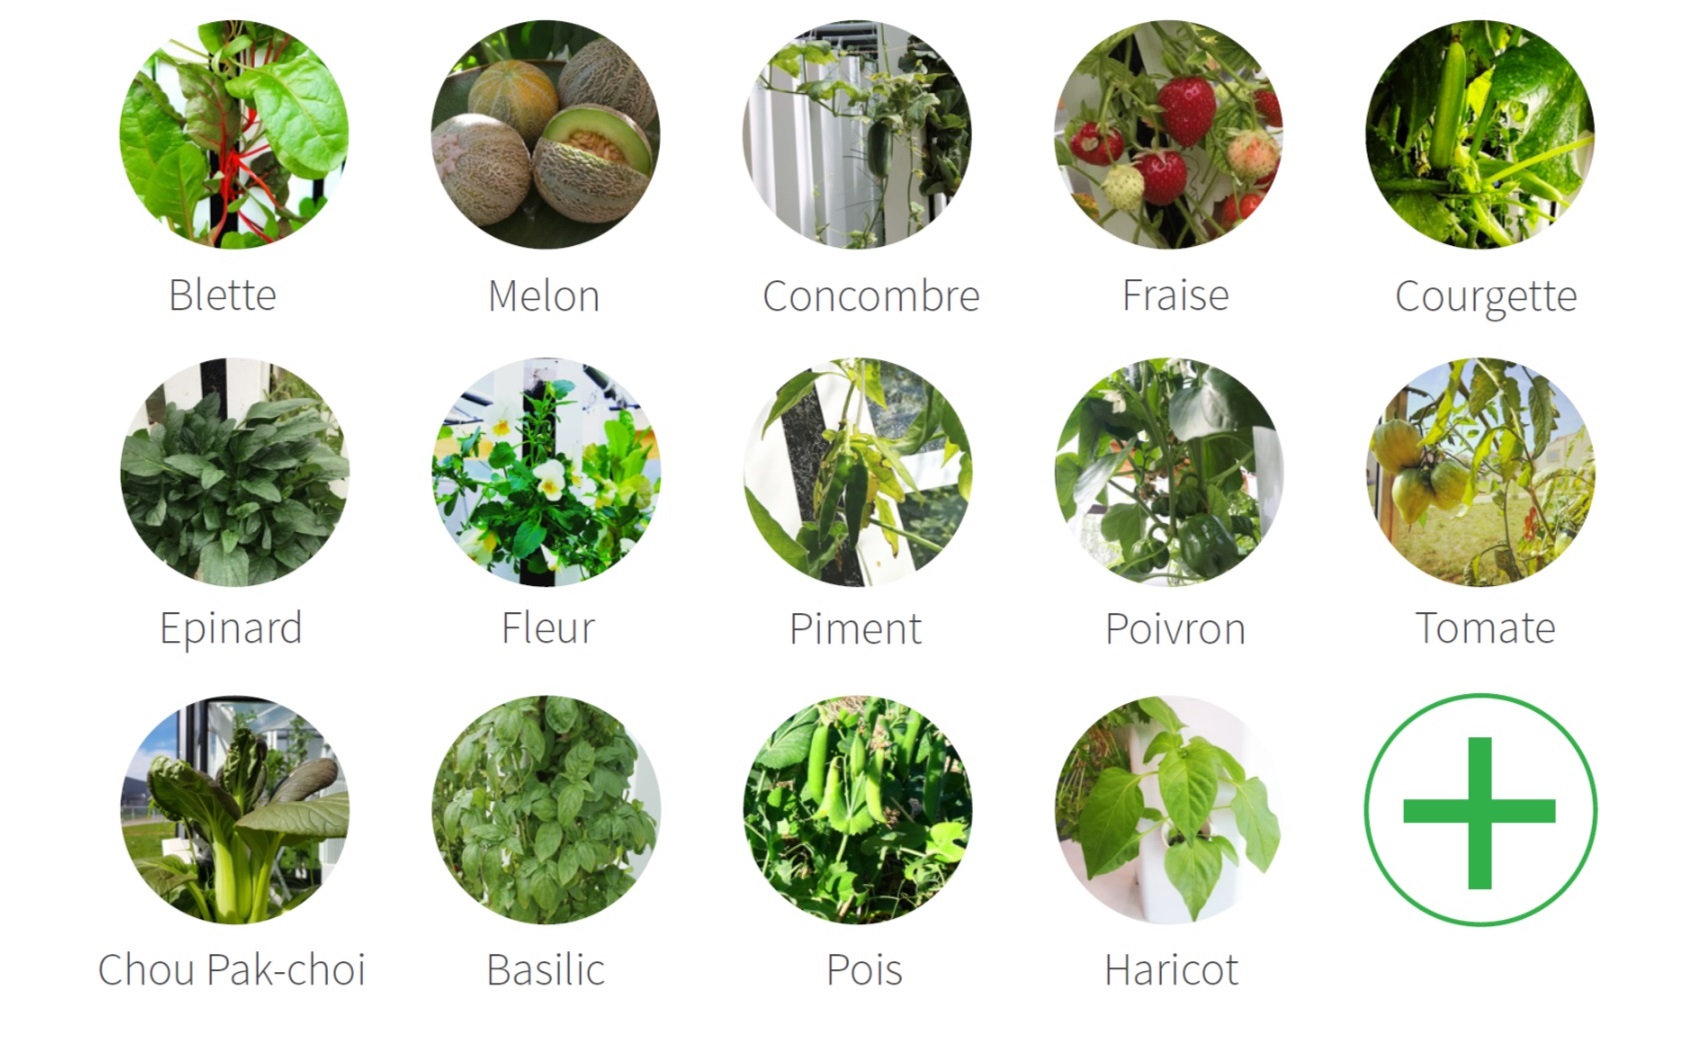
Summer plant species suited to growing in Aerospring
Aerospring is not suitable for growing roots and tubers.